The Blaaahg

Not just another food blog.
There is no magic bullet for gut health.

I just received an email from a PR person asking if I wanted samples of a chocolate peanut butter crunch bar that was supposed to be good for gut health. She explained these bars as “a healthy on-the-go snack that is guaranteed to satisfy your sweet tooth.” I understand what the founders of this company are trying to do: they’re trying to have their cake and eat it, too. Kudos to anyone bringing greater awareness to the importance gut health, I guess, but saying it can be done with a junk-food bar is undermining the truth about how we can actually do better by our bodies. The thing is, there’s no magic bullet for gut health. A highly-processed, packaged food is not going to be the thing that offers you both good bacteria (probiotics) and the dietary fiber that that good bacteria needs to thrive (prebiotics).

Now that mainstream media and consumers are becoming more aware of gut health, it’s more important than ever to be a critical thinker in the grocery store. If it sounds too good to be true (e.g. a candy bar that’s good for your gut) then it probably is!

Prebiotics come from fiber that the good microbes in your gut need to live, but that humans can’t digest on their own. It’s a mutually beneficial relationship! The good news is that you don’t need to buy an expensive, unhealthy bar to get that benefit. Instead, you can buy onions, garlic, bananas, asparagus, sunchokes, beans, oats, and many more inexpensive foods. The best way to feed the good bacteria in your gut is to eat diverse sources of fiber from vegetables and other plants.

Processed food that claims to offer probiotics is junk. Not only are the good bacteria unlikely to even be alive if the food is shelf stable, processed food is processed food, whether there are good bacteria mixed in or not. Be skeptical of something that says it tastes like a candy bar, but also is good for your gut.

If you want to improve your gut health or simply maintain your health, it’s simple: eat a variety of vegetables every day, reduce added sugar as much as you can, and eat meat very occasionally. (And when you do eat animal protein, make sure it is from well-raised, happy meat, chicken, or fish). If you want, buy a refrigerated probiotic and take it with a meal rich in vegetables and other plant-based foods like beans, seeds, and nuts. But, think of this as a booster, since a probiotic on its own will not heal your gut if you’re not also feeding it the food that good bacteria need to survive. Eating well is required for a healthy gut, and thankfully its as simple as stocking up on fresh produce. And, when you’re at the store, skip the aisle with the “magic bullet” bars.

What a year!

Healthyish came out one year ago today. It’s been a wild ride and I am so grateful to everyone who has supported me along the way. If you are reading this and you have bought a copy for yourself or someone else, thank you! If you took time to post about the book on social media, thank you! Seeing pictures of what people cook from the book, hearing about a successful dinner because of one of the recipes, and knowing this thing I created is in your kitchen makes what I do meaningful. Thank you, thank you, thank you!

(The pictures above are from the best cookbook store I have ever been to, Now Serving. They generously hosted an event for Healthyish and made that cool book wall! I highly recommend a field trip to their store in LA.)

Lindsay Maitland Hunt
It's 2019 and the culture has changed.

Philanthropy is expected from corporations. We expect integrity, ethical values, and a charitable angle from modern companies. In liberal circles, advocating for women's rights, championing diversity, and fighting climate change are a given. These are wonderful advancements. But, in most recipes, the bottom line is just about delicious or hooking a craving mentality. Why do we accept this status quo?

I spent years developing recipes for whatever was asked of me, whether it was using croissants from a can or my own dream to perfect chocolate chip cookies. It got me a lot of likes on Instagram and it made me a popular guest at a party. It’s more fun to show up with brownies than to be the one with seltzer and carrots.

Delicious first, all else second was how I approached recipe developing for a long time. I cared about short ingredient lists and smart methods because that made dinner easier. Taking health into account felt limiting and sad. (And truthfully, I felt like healthy recipes weren’t the stuff of people like me.) But now, (or for now at least, because nothing is permanent), that time is done.

After getting sick with a grab bag of issues (thyroid, depression, weight gain, itching, bloating, acid reflux you name it) I had to reassess my values. Just delicious wasn’t working for my body. After a difficult reckoning that has taken years, I have come to the realization that how I eat is the key to being healthy. For a long time, I continued to take freelance work that didn’t align with the way I live, but it felt wrong. Why go through all this painful growth only to hide what I’ve learned? So, at the risk of unpopularity, the recipes I write now have to be both good for you and delicious. As I’m researching gut health and deepening my expertise about the connection between what we eat and how we feel, it’s getting easier to stop shilling for sugar.

My work now is to make food that can improve how you feel, and maybe even improve health outcomes, as it did for me. The recipes will still be delicious, streamlined, and practical. As a culture, we are focused on living authentically and on improving our lives. Feeding our bodies healthfully is part of living in a way that's aligned with those values, and I am here to help you, if you want.

Lindsay Maitland Hunt
What Constitutes Success for My Year of No Sugar?

Ah, the accidental slip up.

A guileless mistake free of loopholes or excuses. It was bound to happen, and my take is: it’s not a big deal.

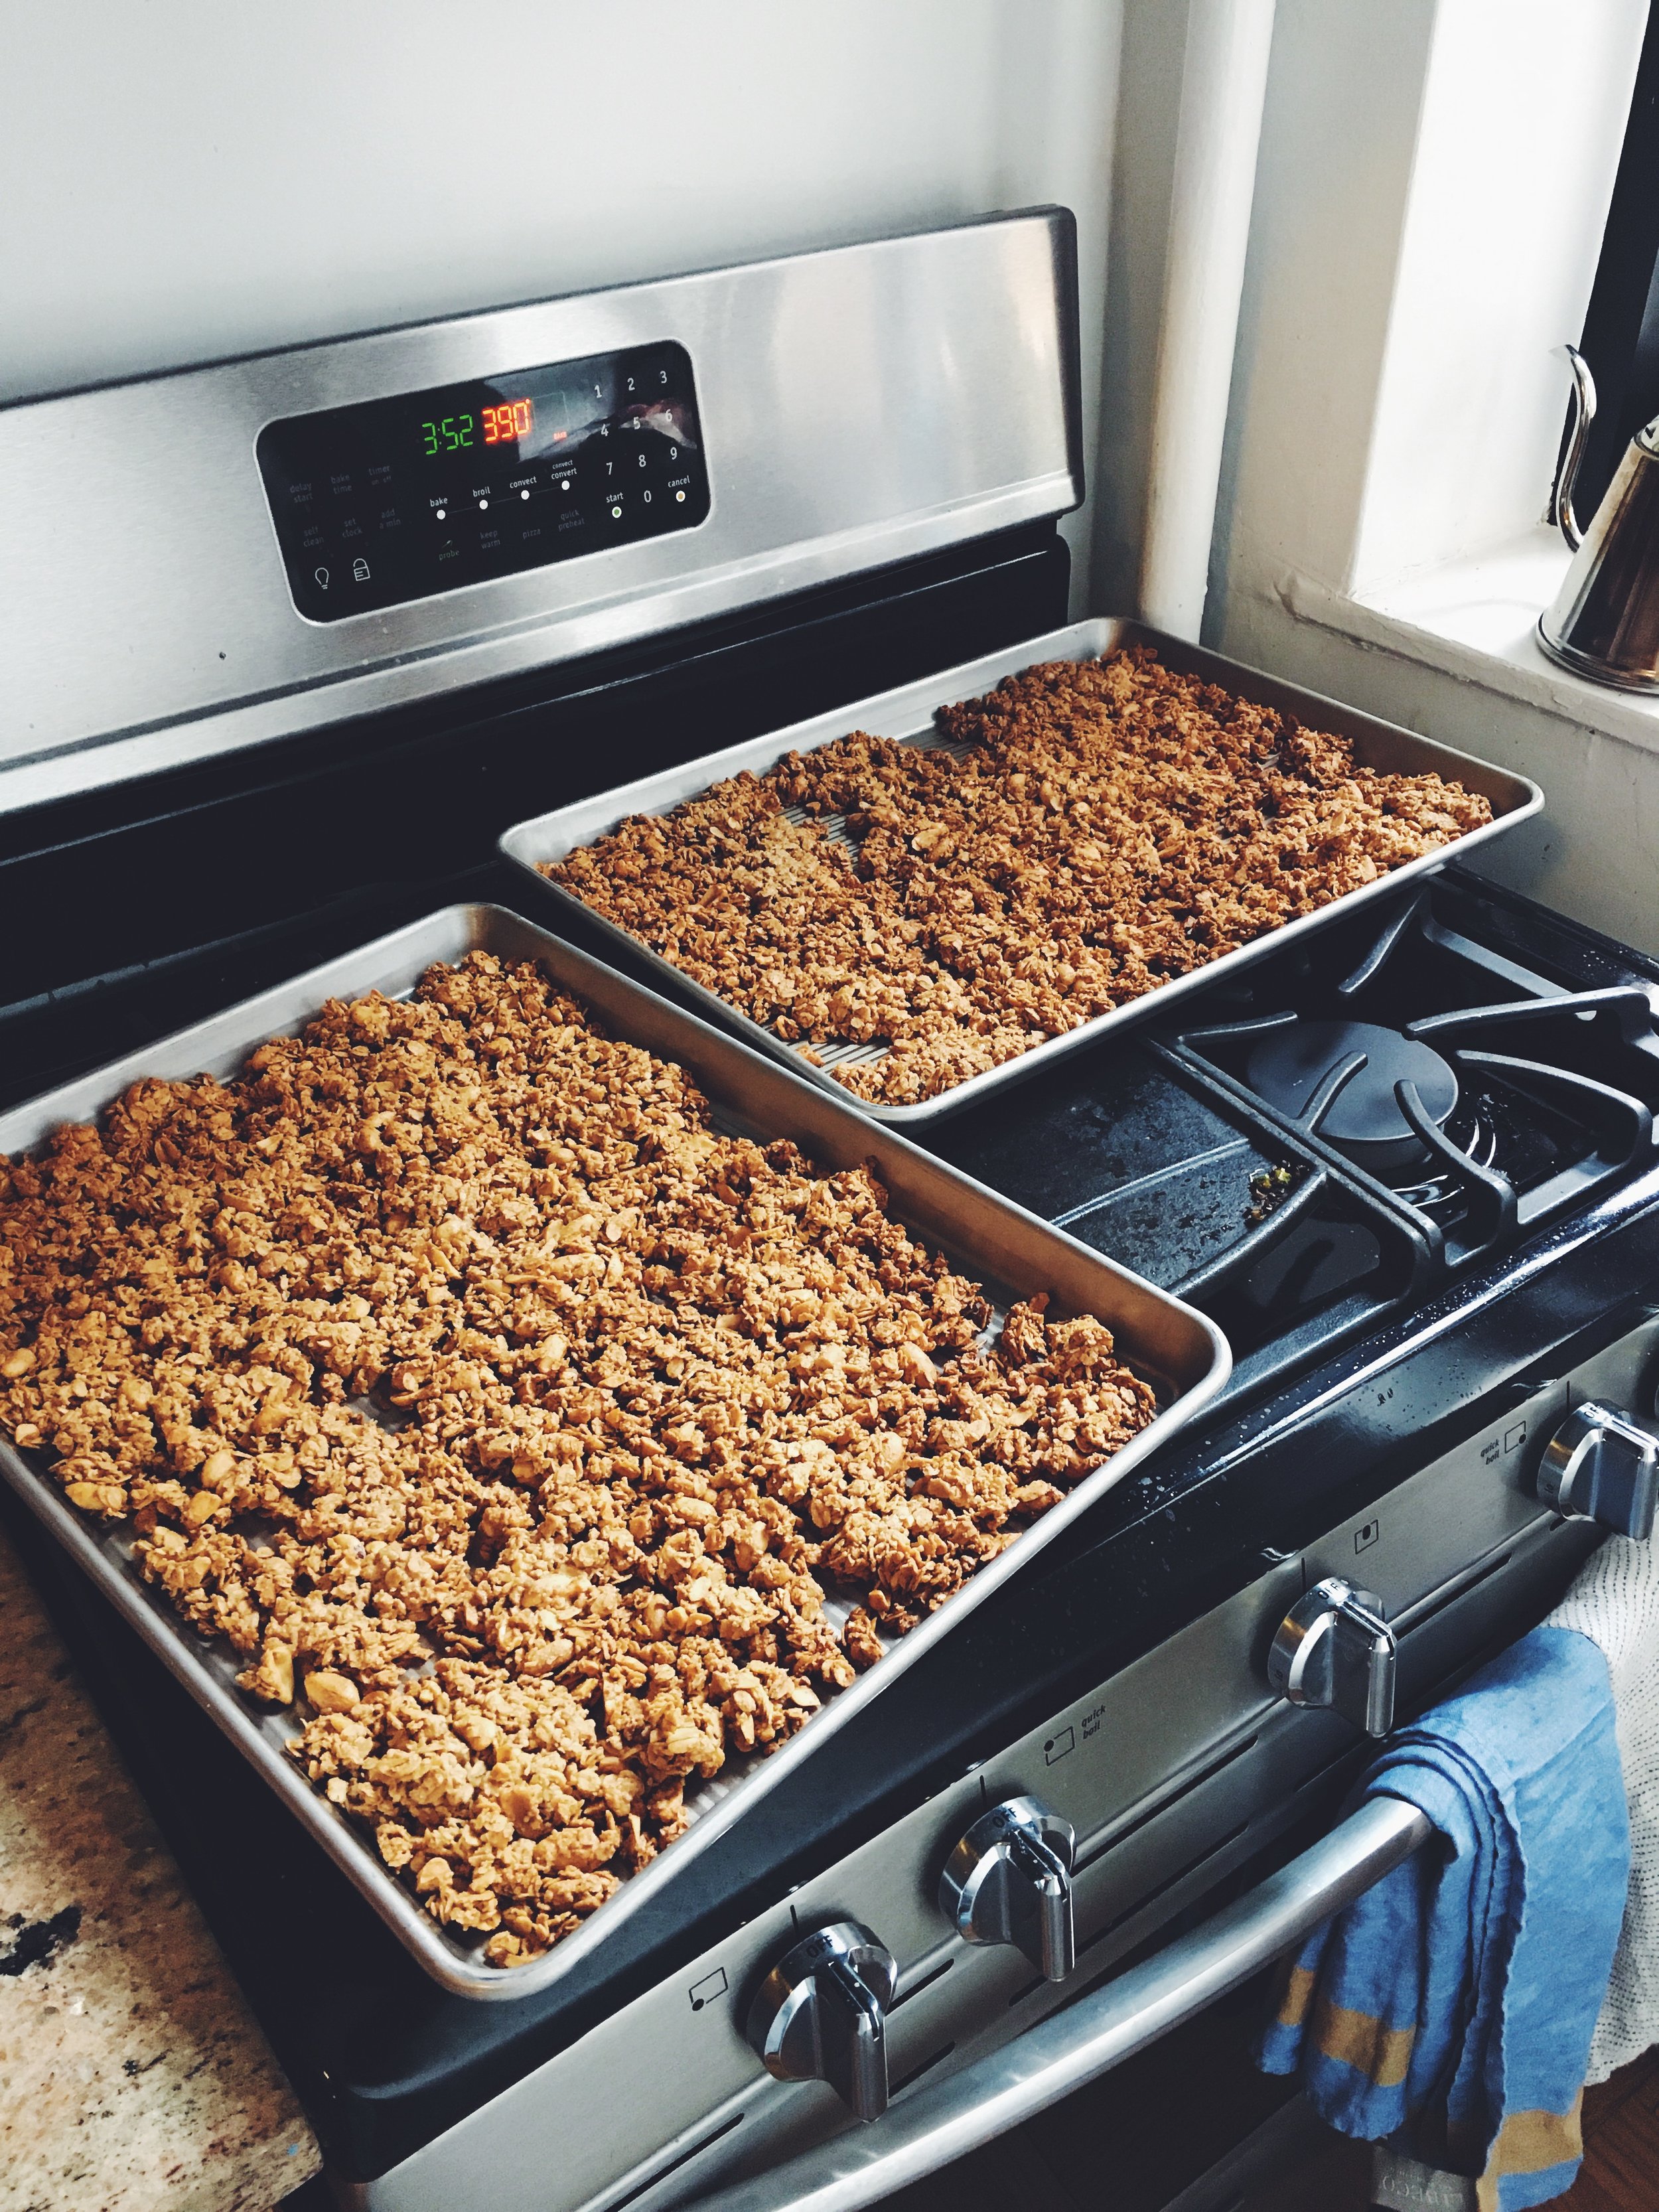
The granola in question.

The granola in question.


I woke up this morning, poured some buckwheat granola (a recipe from my new book) into a cereal bowl, topped it with almond milk, ate it while drinking my coffee, and then started my morning writing. It wasn’t until 30 minutes later that I realized I had eaten something with added maple syrup in it.

Now, yes, there is something like 2/3 teaspoon of maple syrup per serving in my buckwheat granola recipe. And the rule for my experiment is: no added sugar. Right? But, am I going to throw out the day because of that slip up? Maybe hard-liners won’t agree, but I think the benefits of the seeds and oats—packed full of fiber and protein, outweigh the negative. That’s why I’m including the recipe in my new book, which includes a few recipes that are low in sweetener, but not completely free of it. The point of this year without sugar is to see what living this way is like, to come away with a clearer idea of my relationship to treats, and to eventually create a guide for people who want to similarly want to rethink their relationship to sugar. I learned today that I sometimes eat first and think after, and that was a worthwhile lesson to learn.

Choosing this grey area might not make me have a “perfect score”, but it seems preferable to me than throwing away this day as one of my 10 free days. I’m choosing to see eating a little maple syrup-sweetened granola does not make this a failure, but rather a normal stumbling block during this experience. This will happen, and I will choose to see a 95- or even 90-percent success rate as a huge feat.

Three Short Articles Worth Reading Today

This week was a big week! I started the blog up, sent out my first newsletter, and wrapped my head around the year to come. Now as I prepare to start another week (and am taking advantage of an airport delay) I wanted to highlight three articles I’ve enjoyed this week that have to do with better living in kitchen, body, and mind.

First, a quick update a surprising challenge to My Year of No Sugar. It turns out that sitting in an airport for a few unexpected hours is a great way to confront my biggest alcohol and sugar loopholes: bad travel eating. I’ve tended to look at travel—something I find anxiety producing and inconvenient—as a time when I can indulge without consequences. A woman sitting next to me patted her husband on the back, handed him a bag of Twizzlers, and said, “We deserve some treats right now, right?” I mean, pass a few Twizzlers, please! It’s true that I’ve historically treated myself during travel days, and with sugar and wine off the table, well, chamomile will apparently have to cut it. We’ll see how I get through the next few hours!

  1. Why eating less meat is the best thing you can do for the planet in 2019 from The Guardian. Not only does eating meat (especially beef and pork) tax the planet, I’ve learned while researching for my new book that a meat-heavy diet preferences the growth of carcinogenic producing bacteria in our guts. The bottom line: Less meat and more vegetables equal a healthier planet AND a healthier you.

  2. What Do 90-Somethings Regret Most? by Lydia Sohn. In our youth-obsessed culture, this is a reminder that a 90 under 90 roundup might teach more lessons on how to live life than the lauded 30 under 30 list. And, as someone who struggles with being a workaholic—often choosing my work over seeing a friend—this is a reminder that relationships are what matter in the end.

  3. How Being a Workaholic Differs from Working Long Hours — and Why That Matters for Your Health from Harvard Business Review. Yes, I just called myself a workaholic, but I’ve read surprisingly little about how this issue affects health. The scary truth is that the health risks of being a workaholic are real—even for someone like me who is intrinsically motivated and loves their work. If you can relate and have a hard time turning off the work thoughts or “cannot remember the last time [you weren’t] feeling stressed or anxious about work” it’s worth reading this article in full.

    From the article: “Unlike people who merely work long hours, workaholics struggle to psychologically detach from work. And we know that ongoing rumination often goes together with stress, anxiety, depression, and sleep problems, and it impedes recovery from work. Stress levels in workaholics are therefore often chronic, which leads to ongoing wear and tear on the body.

    Here’s a quick explanation of why: To cope with stress, the body activates several systems (e.g., cardiovascular, neuroendocrine). So say you’re facing an important deadline. As you approach it, your stress hormones (e.g., cortisol), pro- and anti-inflammatory cytokines (e.g., interleukin-6), and blood pressure would likely go up. But after the deadline, these would return to their original levels, known as the “set points.” When you’re working an excessive workload and continually pushing your system beyond its range, you may re-set your set points. Elevated blood pressure may become chronic, and cortisol levels stay elevated. When your biological systems keep working around elevated set points, you have a greater risk of cardiovascular disease (CVD), diabetes, and even death.”

Lindsay Maitland Hunt
Healthy Cooking Essentials: In Praise of Rimmed Baking Sheets

While writing Healthyish, I went back and forth about whether to include a list of tools to keep in your kitchen. When there are so many general cooking books offering similar advice, I wondered whether I should add to the noise. Do I really need to provide a list of what to have in your kitchen, when almost every cookbook offers one? In the end I decided no—Healthyish was about encouraging people to cook, not about making them feel like they needed to buy a bunch of kitchen equipment.

Now that I am writing a cookbook about gut health, I see the value now in giving a simple list of essential tools, because an easier, more streamlined experience in the kitchen makes it easier to commit to a new way of eating. It’s fine to wing it when you’re boiling pasta and topping it with butter and cheese, but a soggy salad because you don’t have a salad spinner? That’s a shame. Or maybe you can’t rinse your beans or grains because you don’t have a large fine-mesh strainer? It just makes healthy cooking feel like a chore. The right tools can save you money, too, as in the case of my all-time favorite lemon squeezer, which gets 20% more juice out of every lemon.

After almost a decade working in test kitchens and my experience reviewing kitchen tools at Real Simple Magazine, I’ve developed the expertise to know what’s worth buying (and what’s not), and which brands make the best version. I’ll be sharing one tool at a time, then eventually rounding these up into a guide to stocking a healthy kitchen on my website. And, yes, there will be a guide in my next book, and probably every one after that.

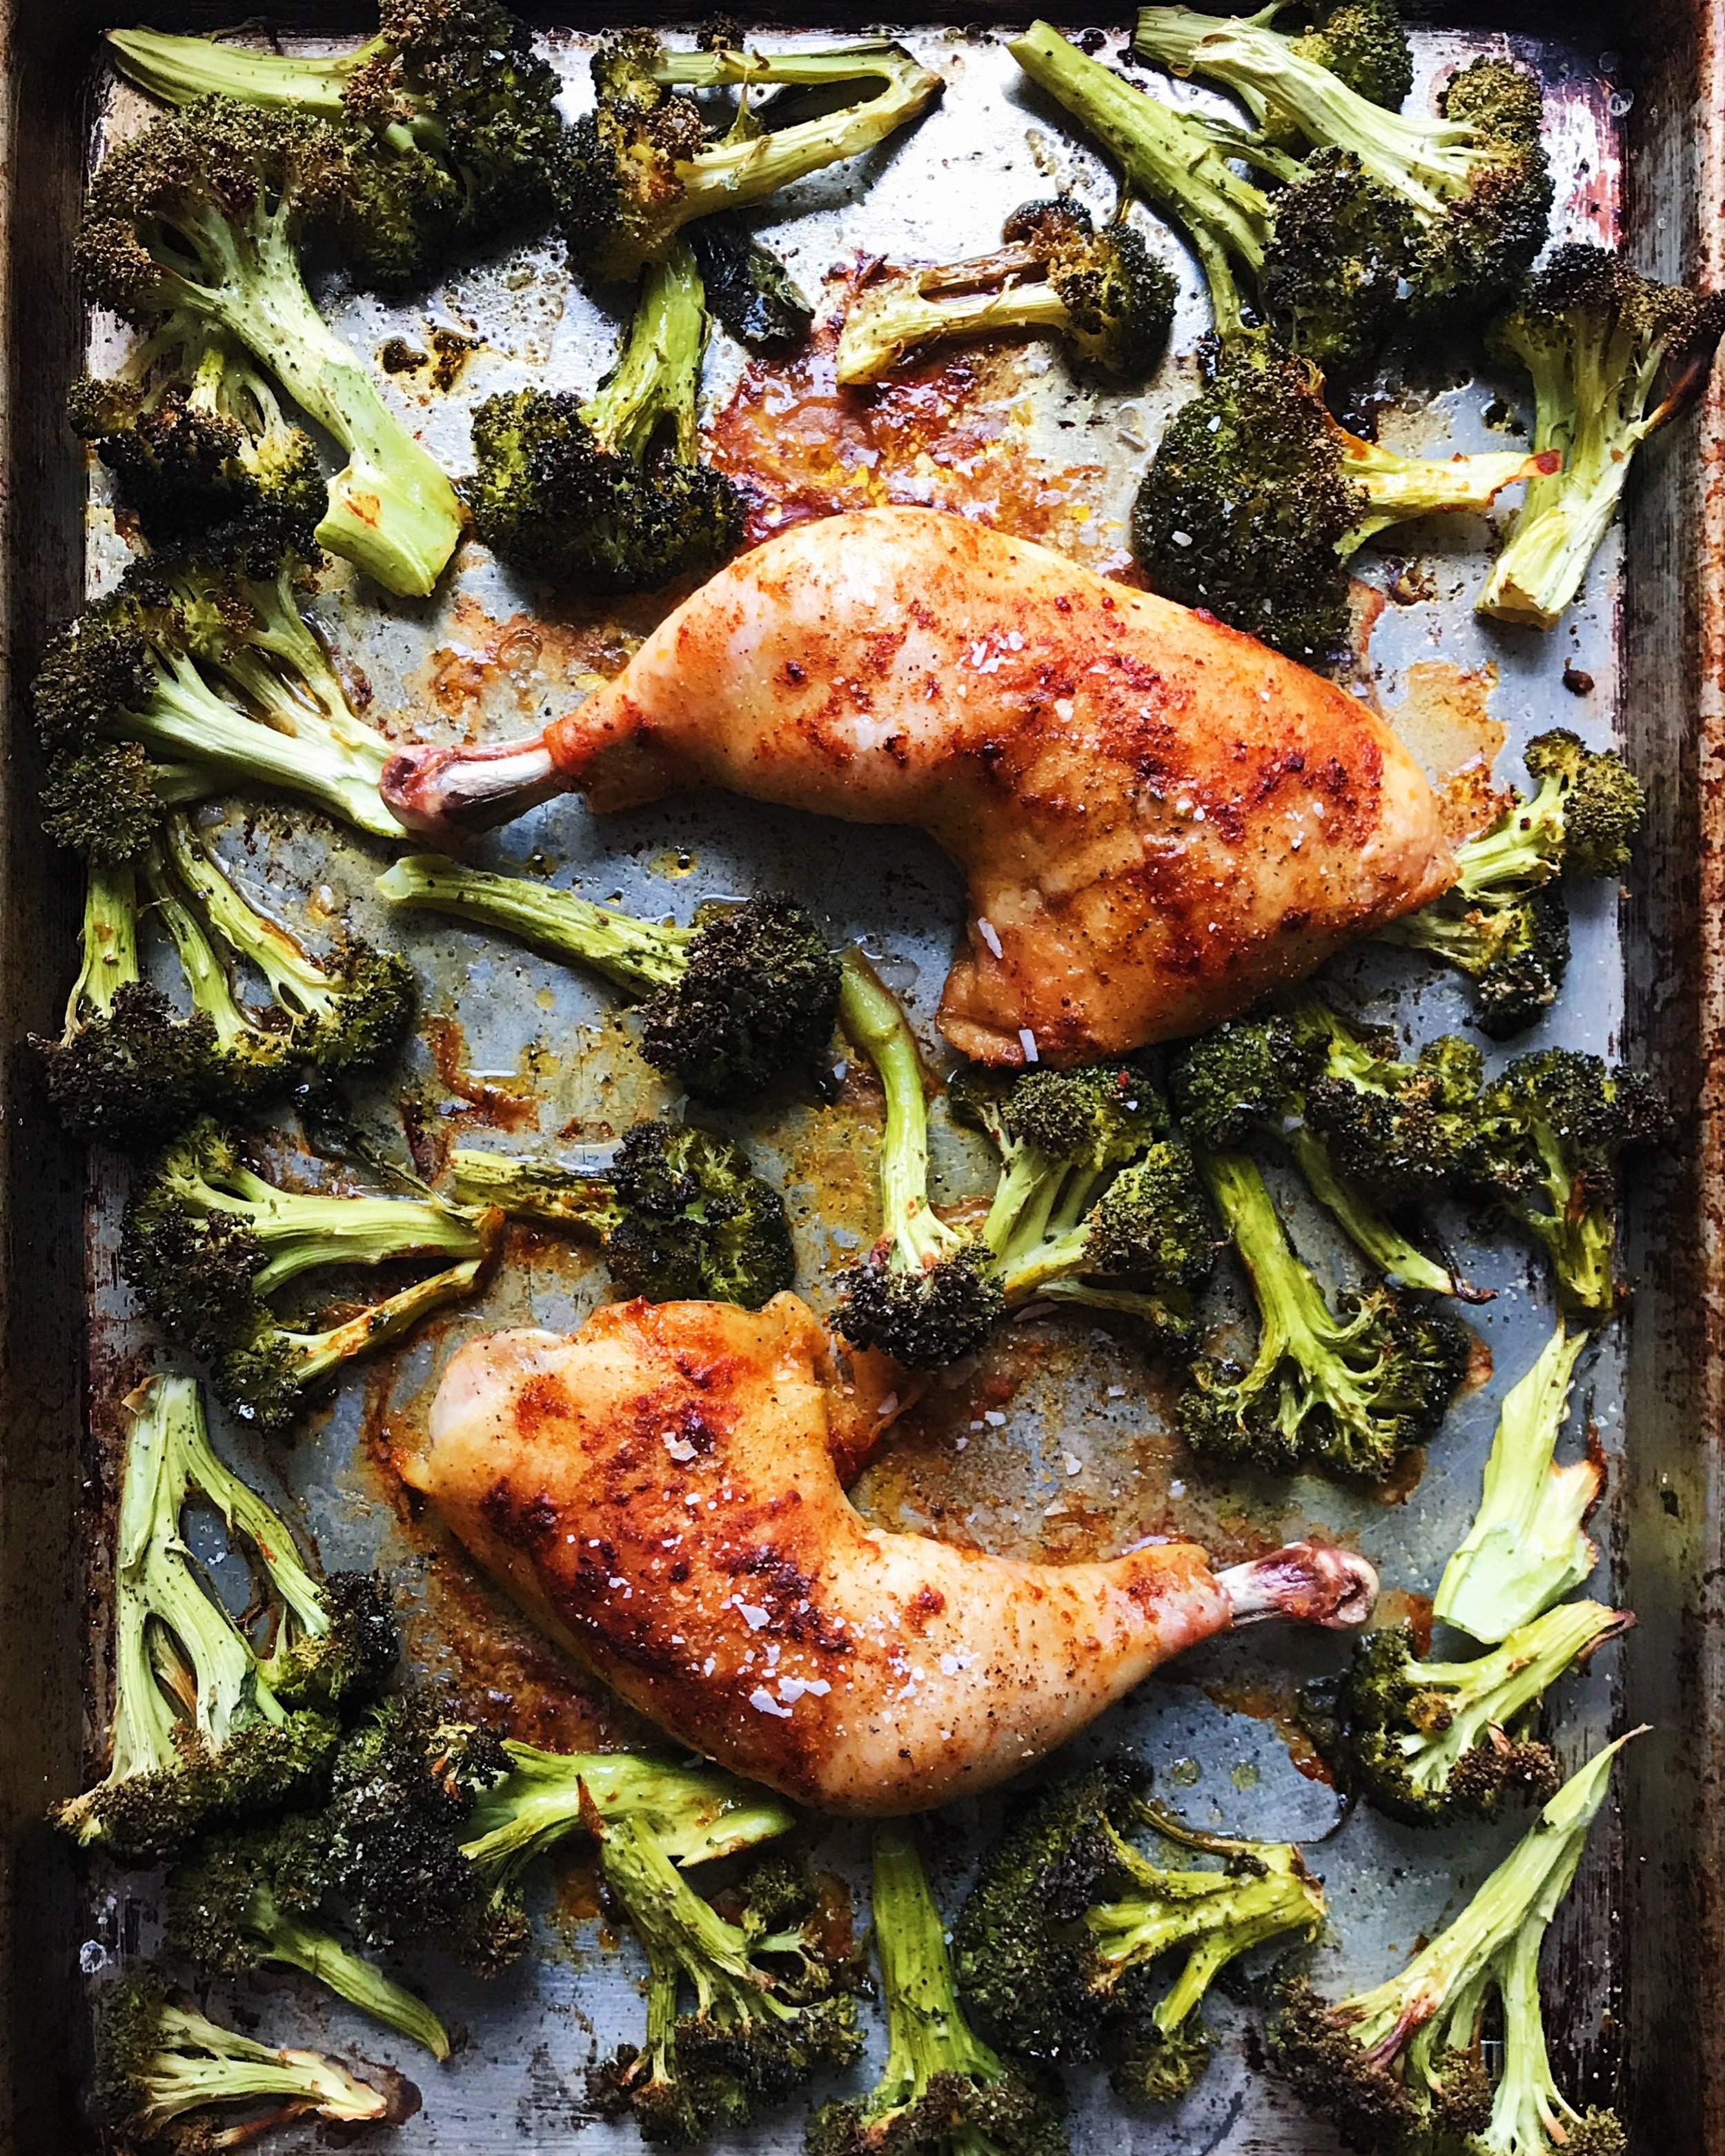
Today we are starting with rimmed baking sheets, which are the key to amazingly delicious vegetables.

6 Reasons Why Rimmed Baking Sheets are a Healthy Kitchen Essential

It wasn’t until today while hanging out at my sister’s apartment watching her roast three batches of cauliflower in a single 9-by-13 baking pan, that I realized I had taken the ubiquity of rimmed baking sheets in professional kitchens for granted.

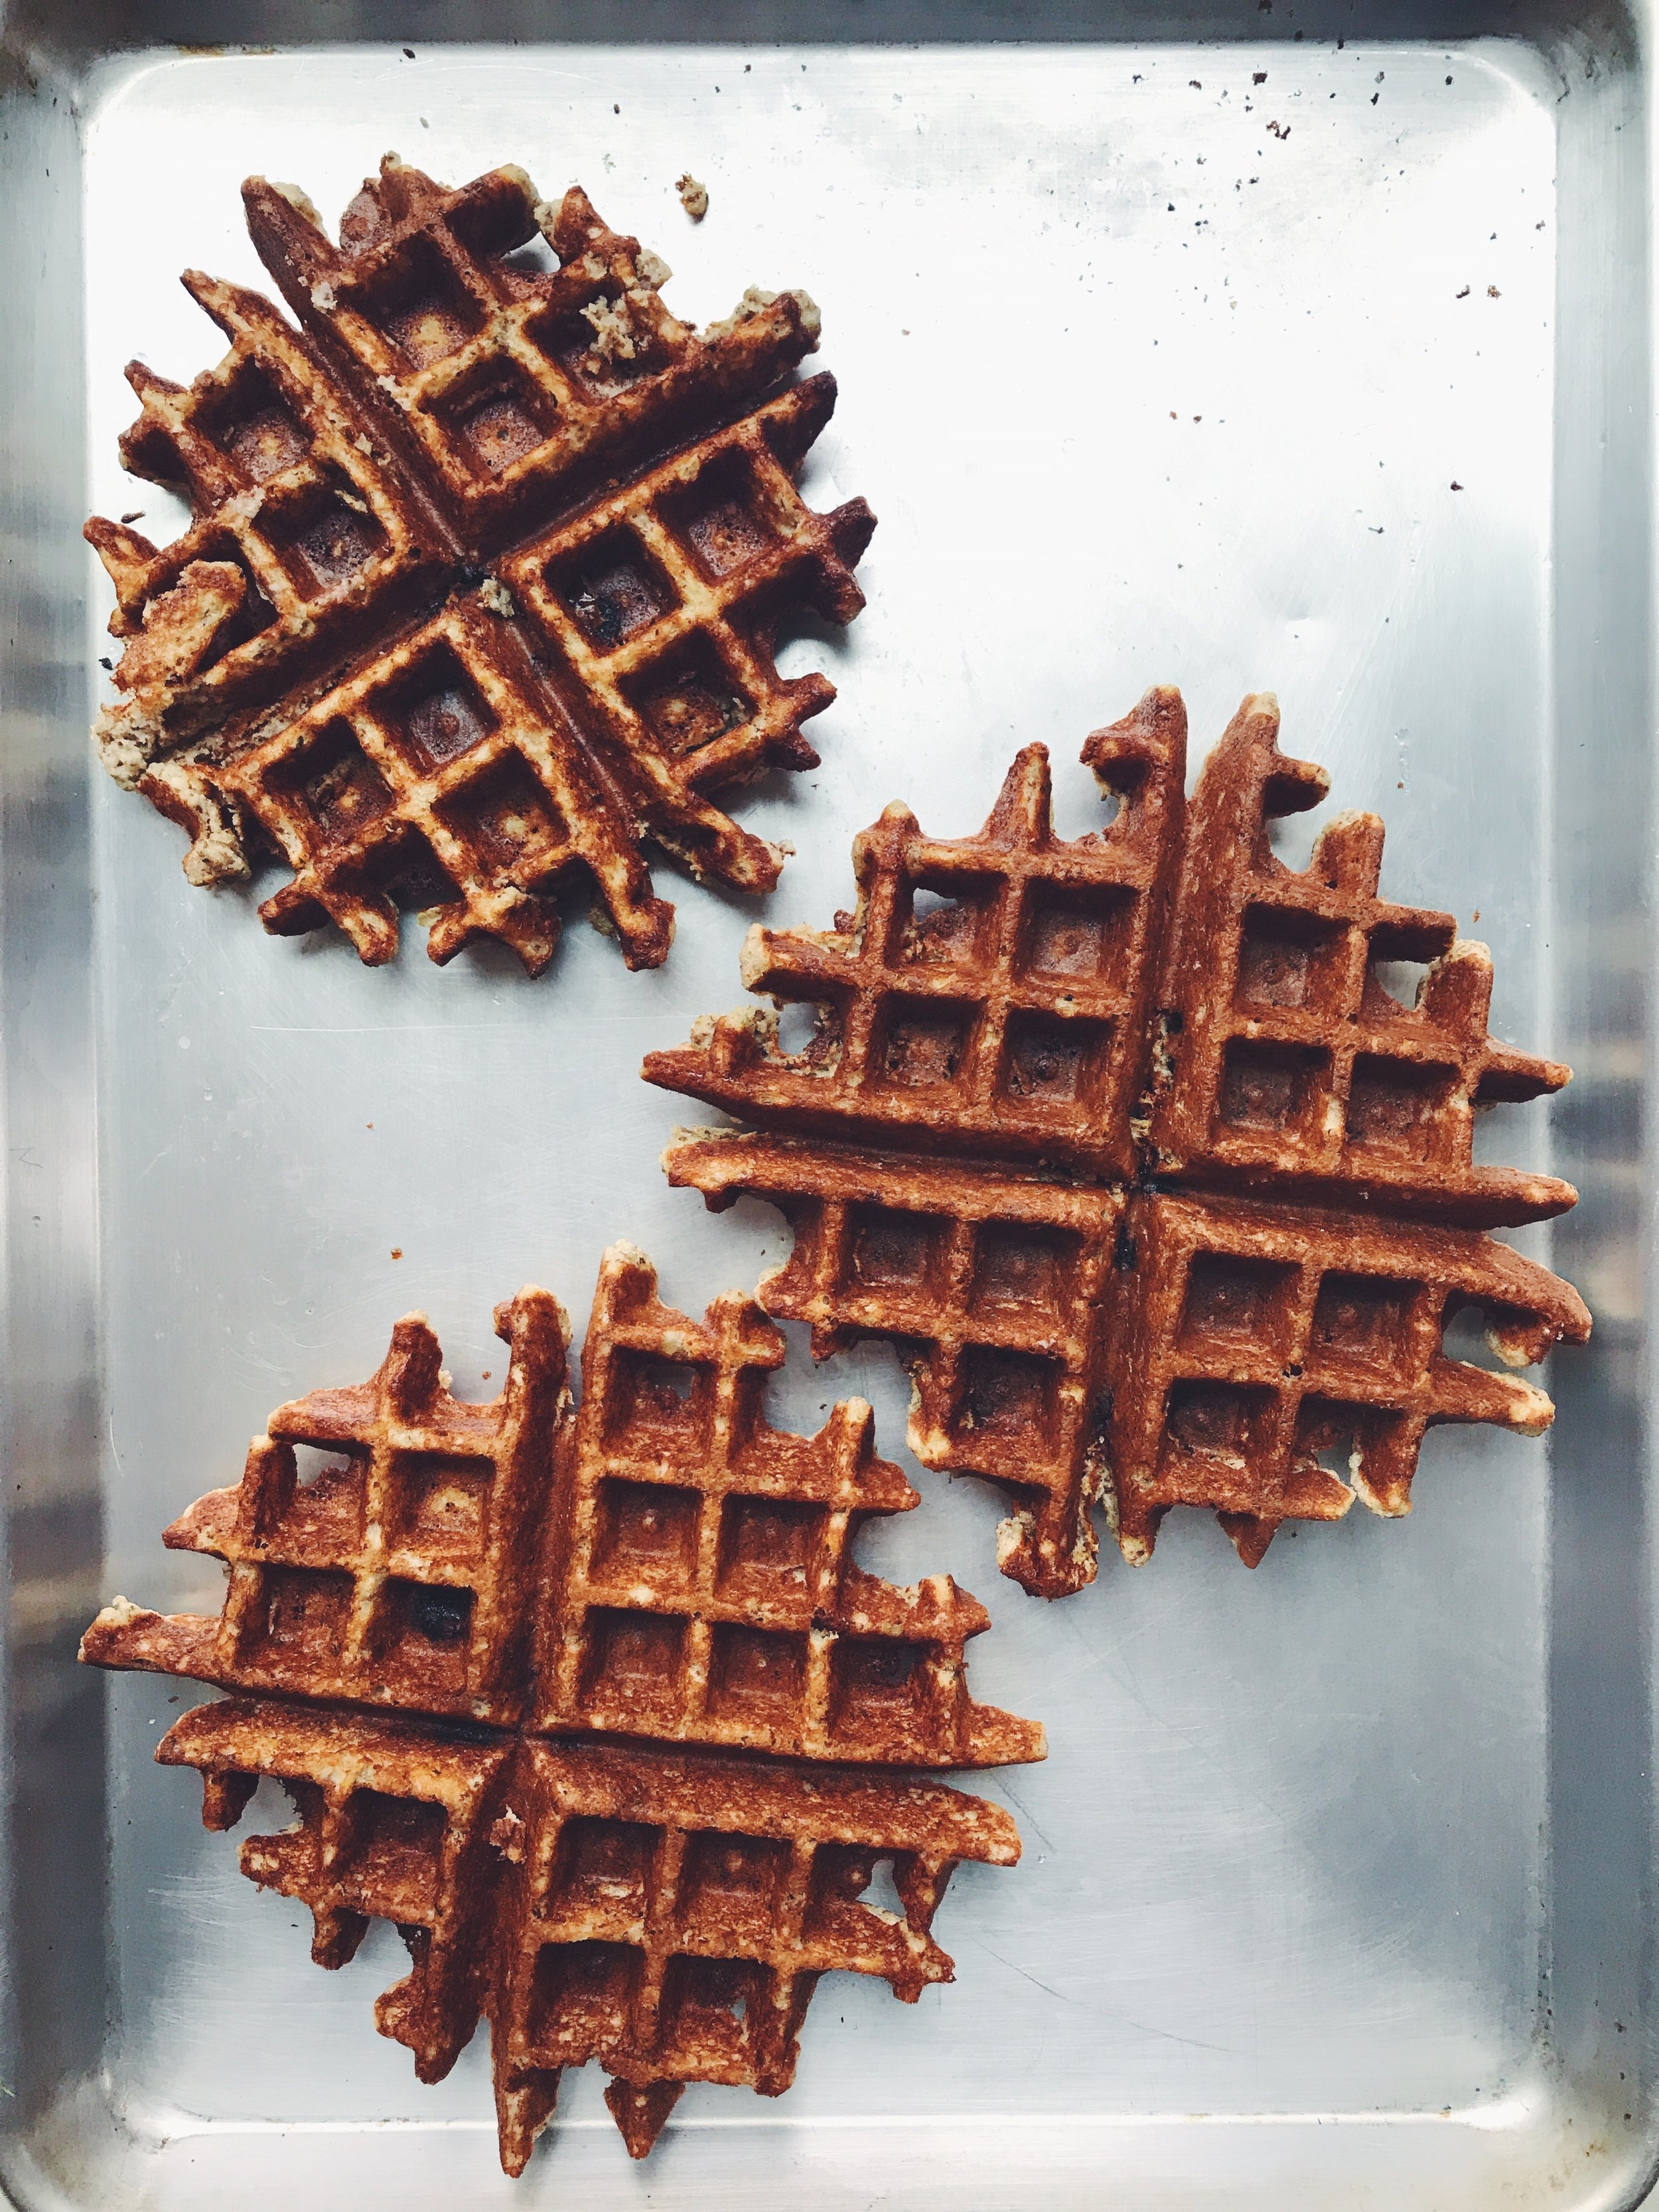
If you don’t own rimmed baking sheets already, I think they’ll make a revolutionary difference in your cooking experience. Too far? I don’t think so. I rely on these baking sheets to keep pancakes and waffles hot in the oven so I can serve everyone at once, I use them to toast nuts and seeds, and when I decorate sugar cookies, I do it on a the small, quarter-sheet size, so that sprinkles and icing don’t run all over the table.

If you have another way you make use of your rimmed baking sheets, please let me know in the comments!

  1. Less Mess: A rimmed baking sheet prevents little bits from falling into the oven, making it easier to toss roasted vegetables, granola, or allowing any juices to slip down onto the oven floor.

  2. Streamlined Recipe Prep: You might have seen these types of prepped trays on cooking shows with the “mise en place” of a recipe’s ingredients. The rim keeps everything from sliding around as you move the tray. If you’re the type of cook who discovers you don’t have an ingredient half way through a recipe—try this tip.

  3. Avoiding Soggy Grains: Spreading cooked grains (e.g. brown rice, barley) and grain-like seeds (quinoa, millet, etc.) on a rimmed baking sheet after cooking and draining helps them cool quickly, avoiding them becoming soggy.

  4. Corralling Ingredients in the Fridge: I use the smaller quarter sheet pans to keep like-ingredients together in the fridge. For instance, condiments or prepped salad ingredients.

  5. You Can Set a Wire Rack Inside a Rimmed Baking Sheet: Why does this matter? Well, you can roast meats on top and catch the drippings below, or when drizzling chocolate on caramels or cookies, the mess is easily contained.

  6. Easy Handling of Hot Dishes: I set almost every baking dish onto a rimmed baking sheet, whether it’s a casserole dish, pie plate, or springform pan. It’s much easier to move a hot pie in and out of the oven when you can grip a rimmed tray, and you don’t risk sticking an oven mitt into the food.

Shopping information:

Rimmed baking sheets aren’t too pricey considering what a kitchen workhorse they are. Avoid ridged or nonstick ones if possible, since I find they steam rather than give vegetables a nice caramelized edge.

My favorite brand is Nordic Ware, and I recommend buying 2 Quarter Sheet Pans ($23 for both) and 2 Half Sheet Pans ($20 for both) to start.

On Being Sick When You are Self-Employed and Single
soup-for-when-you-are-sick-LMH.JPG
eggs-beans-and-broccoli-rabe-LMH.JPG

Two healing meals that I cooked thanks to my stocked fridge, freezer, and pantry.

I’ve started off the new year so sick I can barely move. So sick that were I to cry for help, no one would hear me, because my voice is gone. (Yeah, it’s gotten pretty dark over here). What I’ve been thinking about is how difficult it is to choose self-care when you’re self-employed, and how when you are single, choosing taking care of yourself when you’re sick can often feel like a double-punishment.

I used to have a job that included sick days. Paid sick-leave (which should be a universal right) allowed me to outsource the decision of whether being sick deserved a day of rest and recovery. And, since I was making money while binging a tv show, I was essentially being productive (the holy grail of modern society.) But, what about now that I am my own boss and I have to draw the line between whether I work or I don’t?

And why does it make a difference that I’m single, anyway? There’s no doubt that choosing between self-care and “persevering” isn’t just an issue for single people. I can’t even imagine how difficult it is to really rest when you are a parent or primary caregiver. But I can only speak about what I know, which is that when I decide to take off work to heal, TLC would go a long way, even if it’s just making me a slice of toast (or a slice of gluten-free, seeded loaf, in my case).

The sad thing is, it took me a long time to even decide I was sick enough to rest. The first day I was sick, I spent the first hour I woke up equivocating about whether I was well enough to go to the farmers’ market to get groceries for work. I decided that I would work on other non-cooking projects rather than take the day totally off.

I woke up the next morning even sicker, unable to move without pain and wishing I’d at least made a store run for tissues and tea. At this point, I decided that I was sick enough to merit a day on the couch, surely. But did it warrant a break from work that could be done from a prone position? I realized how much I externalize permission to take care of myself. Many people when they’re sick would just say, “I need to do as little as possible and take care until I’m better.” Again, that’s something I might have done when working for someone else, but I find it nearly impossible to choose real rest and relaxation when I am behind on my book and I promised myself I’d blog everyday of 2019.

Sure, I’m too sick to cook, but am I too sick to type up recipes? Am I too sick to deal with switching my newsletter platform over? Am I too sick to read research books? Why do I need proof that I need time to recover?

These questions come down to a definition of what is required to heal. Is the mind relaxing essential to the body improving, or not? When are you sick enough to actually take care of yourself instead of other peoples’ needs?

Obviously, stress negatively affects the body, so it would seem that resting would be beneficial to a quick recovery. But, that assumes that the self-employed sick person can manage their stress about not working. And that the single person doesn’t have to extend past their limits to enact that self-care.

There is pain in knowing that no one is coming to help me with the work—it will just pile up while I’m sick. And as a single person (in the albeit privileged position of) living alone, no one will be helping me recover in the interim.

I find myself wondering how other self-employed, single people balance getting it all done and recovering when they’re sick. When do you choose yourself over your business?

The solution, I think, is for your Present Self to enter into a relationship with your Future Self. The you today needs to anticipate what you would want from your partner to do when you’re sick, and to prepare in advance. This could be things like saving that cute rom-com for when you’re stuck in bed, buying a box of tissues so you don’t resort to using toilet paper and then running out of said toilet paper when sick, or keeping high-quality tea on hand to soothe a sore throat. I’d call this The Single Woman’s Guide to Stocking Up (For When You’re Sick and Alone) Subtitle: “Your Future Self will thank you!”. If your Future Self has gone and gotten herself a partner, then well, good for her!

But seriously, I don’t think I would have gotten through the past three days if I hadn’t had some healthful staples on hand. Those included a carton of eggs, jar of kimchi, a couple quarts of frozen bone broth, and brown rice, quinoa, and beans. All staples that are good for the gut, which needs a helping hand when you’re downing cold meds and Advil. I defrosted the broth and simmered it with quinoa, brown rice, and white beans—no timer, no worrying about things getting mushy (you’re sick after all) and this is as close to a healing potion as you get. I added an egg yolk (which cooks when you stir it in) but if you have the will to fry an egg to top it, god speed. Plus kimchi for beneficial bacteria to pair with all those beneficial foods for the gut. Another meal was heated up organic refried beans with avocado, sautéed broccoli rabe, and fried eggs. Healthy but cozy enough to appeal to a sick palate.

The answer with regard to a day like yesterday is to, of course, relax and do what I need to get better. There is no real recipe emergency (if there could ever be one), and I have time left on my manuscript (66 days, but who’s counting). It’s not as much time as I’d like, but it’s enough to take a day to heal. It turns out there’s a lot of psychological work required to believe a simple statement like that. That if you take a day, everything won’t fall apart. That choosing self-care for one or three days won’t annihilate everything you’ve built.

Unfortunately, many people don’t share this view, and their issues with their own self-care will inevitably clash with your decision to do something as simple as curl up with tea, a blanket, and the TV when you’re legitimately sick. That hurts. And social media has only deepened our need for approval on every decision we make. The thing is, the only person who can offer self-care is you. It’s named right there. People without a good relationship to themselves will look at you taking care and maybe pat themselves on the bat for not being self-indulgent, for sticking it out, for pushing through. That’s on them, and in my opinion it’s contributing to the epidemic of burnout in our culture.

For now, I’ll choose to listen to my body, watching Netflix when I need it, typing up recipes when I feel up to it. The plan is to take it one day at a time while remembering that no work is worth the cost of my body.

Lindsay Maitland Hunt
How I'm Dealing with Alcohol During My Year of No Sugar

I am very excited about the enthusiastic responses I’ve received to my year of no sugar plan! As I said in my last post, whether you try just one day or an entire year, one of the benefits of pausing sugar is seeing the role it plays in your life. For instance, you might find that buying a cupcake on the way home to “reward yourself” for a stressful day at a work, or absent-mindedly snack through a bag of chocolate-covered pretzels to distract from loneliness. Hey, we’ve all been there.

Alcohol often plays a similar role in our lives, and drinks like wine and mixed cocktails contain sugar, too. So it’s no surprise that one of the most common questions I got was: How will you deal with alcohol this year?

First off, I am doing dry January to reset my body in general. Alcohol can be beneficial in moderate amounts, but over that level it can cause inflammation, and I don’t need to go deep into science to know that my body just doesn’t feel great after drinking a lot. There’s also the emotional toll that drinking takes. Whether it’s feeling a little off the next day to feeling downright depressed, I know that taking a break will be good for me.

Second, I know I’ll be more successful with my year of no sugar if I start with a month without alcohol. Alcohol lowers inhibitions in general, and lowered inhibition tends to be a catchall for tricky behavior, whether that’s eating a chocolate bar or texting my ex. (Again, we’ve all been there.) I don’t have to worry that I’ll accidentally use up one of my ten free days because I had one too many glasses of wine.

But, after this month, I will be reverting to moderate drinking. While I will not be drinking any cocktails that have sugar added, (since that would break rule number one of my no sugar plan), I believe that I can maintain a healthy relationship with alcohol as long as it’s moderately consumed. (To be clear, I’m talking about anyone who is not diagnosed with alcoholism.) What does moderate drinking mean for me? Well, it means somewhere between 5 and 11 drinks a week, but no more than 11. These are numbers I’ve come to after years of self-reflection about the role alcohol plays in my life—while I love drinking, I have my eyes open about the potential consequences of over doing it.

Wine

Even though wine is made from grapes, which contain fructose (the sugar found in fruit), the fermentation process reduces the sugar content significantly. Red wine is lower in sugar than white wine, and dryer wines are lower than sweeter ones. Makes sense, right? You can literally taste the sugar content.

I try to only drink natural wine, which is a wine-making style of minimal intervention in the how the grapes are grown, harvested, fermented, or bottled. This natural winemaking process excludes things that conventional winemakers do like adding sugar (!!), unfermented grape juice, or other chemicals during the fermentation process. If you want to learn more about the way conventional wine is manipulated, I highly recommend Bianca Bosker’s book, Cork Dork. While some organic wines are natural, “organic” alone doesn’t mean that the winemaker didn’t intervene in the growing or fermentation processes. Natural wine is a philosophy as much as a method of growing, and I like supporting producers who are making quality products in the name of better-for-you (and more delicious, IMO) wine. Enough preaching for now, but if I caught your interest and you don’t know much about the subject, I like Marian Bull’s refreshingly unpretentious overview of natural wine on GQ.

Spirits

Anywho. Maybe you’re curious about more serious booze, like whiskey or vodka or tequila. And don’t skinny girls always drink vodka with seltzer? Maybe they’re onto something… Truthfully, I always resented the thin ladies who’d order a drink like this because I felt like a lush who didn’t care about her body. But it turns out I learned more than just how to self-direct my body shaming, that skinny girl cocktail is right on the nose, which is that you can indulge without drinking sugar. Spirits like gin and vodka are low in sugar, again, because of the fermenting process, and they’re even lower than wine. My favorite cocktail is mezcal (for the smoky flavor) mixed with seltzer, crushed mint leaves, a squeezed lime (throw the halves into the glass after juicing). If you care about grain-free drinks because you’re paleo or extra serious about “carb-free” living (btw, all plants have carbohydrates, people) then tequila and mezcal are for you, since they’re refined from the agave plant, which is a succulent, not a grain.

For more detailed guidelines, click on over to Sarah Wilson’s guide to alcohol on a sugar-free diet over on Mind Body Green. After my month without drinking, I’ll be going back to wine and spirits, particularly mezcal. Since I’m gluten-free, I didn’t address beer, but you can find more details at the link above.

Finally, let’s all please recognize that there’s nothing to be won by claiming any kind of alcohol is healthy. Repeat after me: enjoyed in moderation and with company, it’s fine, but alcohol is not a requirement for a healthy life.

Lindsay Maitland Hunt
Why 2019 is My Year of No Sugar (Plus, How I'm Doing It)

Here’s a tip: If you want to ruin a conversation, accidentally make someone feel judged, or announce yourself as a party pooper, just tell someone that you are trying to cut out sugar. Sugar’s deep emotional connection runs like a main artery to the heart of nostalgia, tradition, and celebrations—all hallmarks of community and connection. Since sharing with people in my life that I’m attempting a year without sugar, I’ve learned that saying there will be no cake lands with the effect of announcing there will be no fun at all. But why?

First, I want to establish a couple things, including what I mean when I use the word sugar, and how I got to this point of cutting out sugar at all. And, I should say that I’m writing this after a very gradual lifestyle change from obsessively baking chocolate chip cookies to planning this year with no dessert, so I wouldn’t recommend jumping in cold turkey. Even doing one week without sugar is worth trying, to reset your palate and take an honest look at the roles dessert and “treats” play in your life.

Here’s what I mean when I use the word “Sugar”: I am talking about any refined substance that’s used to sweeten food. That means cane sugar, sugar that’s produced from beets, maple syrup, coconut sugar, honey, evaporated cane syrup, agave nectar, and more. The writer Eve O. Schaub, who wrote about her own year of no sugar, has a helpful sugar alphabet that you can use as a resource. Fruit does have sugar, but the experts who I trust, like Dr. Robynne Chutkan, does not advocate cutting out fruit, since there are fiber and nutrients to balance out the sugar content. Simply put, if a food is refined to where it can be scooped into a cup or poured into a batter and turned into a treat, then I consider it sugar. (I do not consider dried dates sugar, as they contain fiber and minerals when eaten in their whole form. However, I do consider date sugar and date syrup to both be “sugar”.)

I started questioning sugar’s role in my life when my health hit rock bottom two years ago. I was dealing with a growing grab-bag of modern chronic illnesses like hypothyroidism and PCOS, plus symptoms that couldn’t be tied to just one diagnosis like incessant itching, significant weight gain, depression, and near-constant thirst. I’d already severely limited gluten and dairy, but I was sick and getting sicker. When my symptoms of pre-diabetes continued to get worse, I decided to cut out sugar—holistic nutrition and functional medicine talks about sugar’s negative effects on health, but my more mainstream doctors didn’t once talk about how harmful sugar is to health, or even advocate a diet change at all. The answer was always pills. (I should mention that while my health had taken an extreme turn for the worse, exacerbated by my high-stress lifestyle, unchecked anxiety, and use of modern medications like Advil and proton pump inhibitors like Prilosec, it doesn’t take a handful of diagnoses to show that sugar has negative effects on any person’s health, whether you perceive yourself to be healthy or not.)

The pills, the constant doctors visits, and the terrible way I felt were all adding up to a depressing lifestyle. Cutting out sugar was my final step (and one I did not want to take), but it was without question the decision that set me on the path to health. But first, I had to face the fact that my emotions were the biggest roadblock to sticking to my plan.

I’m not alone in the attachment to sugar as a mythical cure-all. Sugar has a reputation as a panacea for all types of woes, both physical and emotional, or both—whether it be a bottle of coke to calm soothe a queasy stomach, or the idea that a box of chocolates can cure heartbreak. (Remember that scene of Elle Woods eating chocolate truffles in Legally Blonde?)

The reach for sugar to distract from emotional pain is pervasive in the day-to-day management of loneliness, too. I’m certainly not the only person who’s made an ice cream sundae to cope with lonely nights. The thing is, I’m not really even a sweets person (I’ll take cheese over a cookie any day), but this feeling that a dessert could help what ailed me is so baked into our culture, I rarely stopped to question why I was scooping ice cream out of the carton. The key to actually stopping was addressing the reasons why I reached for something sweet at all.

The idea that sugar has healing effects has been promoted by the sugar industry, or Big Sugar, for hundreds of years, and for a fascinating, terrifying, in-depth read, I recommend Gary Taubes’ The Case Against Sugar. But, you don’t need to read his (frankly dense) treatise against sugar to know that it has deleterious effects on health. Sugar is the cause of many chronic illnesses like Type-2 Diabetes, hormone-imbalances, and metabolic issues. Alzheimer’s is even being called Type-3 diabetes. Not to mention, sugar wreaks havoc on the gut. It can cause bad bacteria to outnumber good bacteria (known as dysbiosis) and sugar-loving yeast can not only set up camp in your digestive tract, they send signals to your brain to feed them—aka eat more sugar!

At the risk of overwhelming any intrepid readers who are considering their own sugar-free quest, I’ll stop here. In the upcoming weeks, I’ll continue writing about sugar, the role it plays in our lives, and how it affects the body throughout the year. Most importantly, I’ll be offering practical strategies for dealing with inevitable sugar cravings, recipes for treats that won’t spike your blood sugar, and answers to any questions you have. I’ll leave you today with my rules for my year of no sugar.


The Rules for My Year of No Sugar

  1. No added sweeteners (whether they are “natural” or not, this includes no maple syrup and no honey)

  2. Small amounts of dates are allowed, as long as they are paired with nutrient-rich foods like sweet potato, nut butter, and seeds

  3. I can taste small bites for work—while I am doing a year without sugar, I am not eschewing treats for my entire life. I am including some desserts in my upcoming gut health cookbook that offer a happy medium between sweet and good-for-you, and I will need to ensure they are delicious!

  4. In-season fruit is allowed, ideally organic and locally-grown

  5. 10 free days—I’m not going to miss trying my sister’s wedding cake! Sarah Fain, of my favorite podcast Happier in Hollywood, used this approach, and I’m adopting it to make the plan doable. (Yes, this technically makes my year 355/365 days sugar-free, but if I can do that, then I will consider it a success!)

 
Lindsay Maitland Hunt
Welcome to LMH.How: Thoughts on the Internet in 2019, Blogging, and My Upcoming Year of No Sugar
LindsayMaitlandHunt.JPG
LMH-vegetarian-chili.JPG
 

Hello world! It’s me, Lindsay Maitland Hunt, a nerdy cook and writer. You might be wondering why I’m here, writing at all, when the internet is jam-packed, over-stuffed, really, with people thinking they have something to say. Why add my voice? And isn’t “blog'“ a dirty word by now? (I feel an eye roll throughout my whole body each time I say the word, and a speech bubble with BLAAAHG is floating above my head.)

The reality of the internet today is one of quantity, but not guaranteed quality. The key to cutting through the BS is turning to a trusted voice. So, after almost a decade in the food media industry, one published cookbook, and another on the way, I am excited to create a space to share cooking tips, recipes, and my reviews of kitchen tools, products, and more. I’m particularly interested in helping home cooks discern a good recipe from a bad one, and explaining what it even means to develop a recipe at all. Consider this your source for any behind-the-scenes curiosity.

I won’t just be writing about food, but about health and better living overall. My upcoming book is about how to eat for gut health—about how crucial food is to maintaining good bacteria in our gut, the connection between the gut and physical wellbeing, and how mental health is related, too. I’ll be sharing a lot about these topics, as well as documenting my upcoming year of no sugar.

No what? Yes, that’s right. No sugar. I’m doing an experiment where I go a year sans sweeteners. Part of doing right by your gut (and by extension your health overall) is cutting the sugar way down to almost zero. But if I—a cook by trade who loves being in the kitchen—can’t do it, then how can I ask my readers to do so? I’ll post my guidelines for my no sugar experiment tomorrow, and I’ll keep you updated regularly on how I’m dealing with cravings, breakdowns, and more.

Please share your questions, comments, and thoughts about what you’re looking for help with. I am first and foremost a problem solver, and I’d love to help with solutions for your healthy eating and living dilemmas. Happy New Year, and here’s to a healthier, happier 2019.

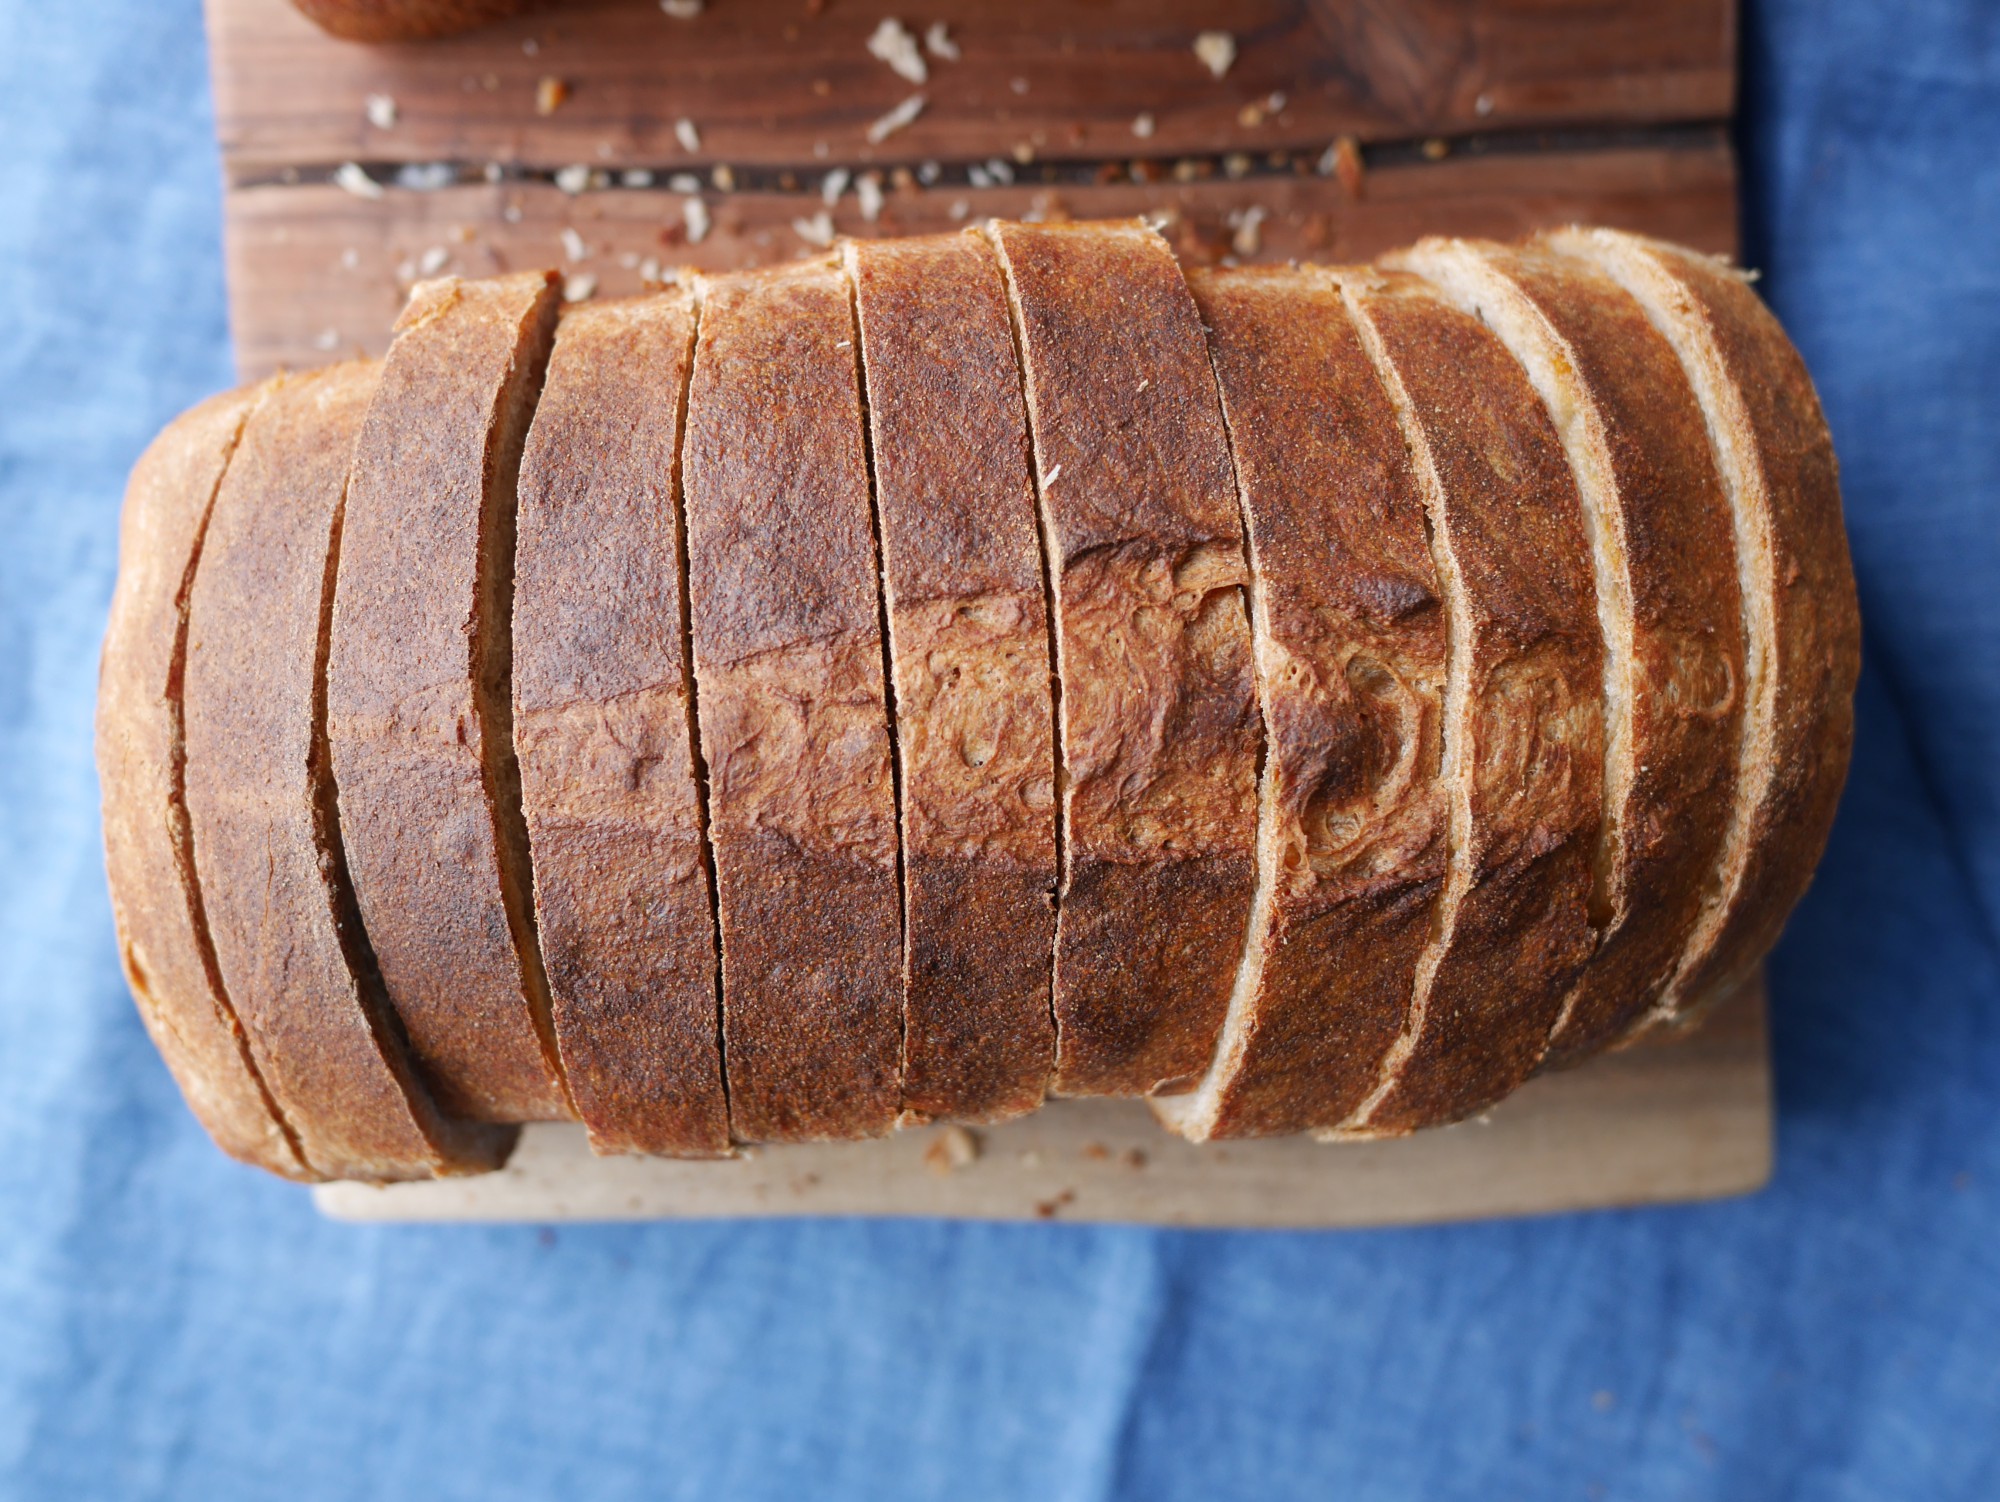
No-Knead Sandwich Bread
 

I've always been a bit intimidated by yeast. Something about the fact that it's a living thing and how easy it is to kill with water that's too hot. The great part about Jim Lahey's no-knead bread method is that you mix the flour, yeast, salt, and water together and let the yeast do their thing. It's a laid back and easy way to make bread and I love it.

Serve this toasted with a schmear of homemade ricotta. I discovered this combination was so addictive this spring, while developing a teaching curriculum for 8 middle schoolers. I adapted this recipe from the original, which needs a covered cast-iron pot and makes a round boule-style loaf. This needs a bit of kneading to help it rise enough in the oven, but not so much it becomes an arm-strengthening production. This allows the dough to rise uncovered (which is different from the original recipe).

Use a digital scale to measure the ingredients, if you can. And, if you made some homemade ricotta, you can save the whey to use instead of the water in this recipe for a nuttier, toastier taste. Just let it cool down completely before using.

p1030382-e1434419486586.jpg

No-Knead Sandwich Bread Adapted from Jim Lahey’s No-Knead Bread

Makes 1 loaf

Ingredients: 400 grams (3 cups) bread flour (ideally half-white half-wheat), plus additional for the work surface 8 grams (1¼ teaspoons) kosher salt 1 gram active dry yeast (¼ teaspoon) 300 grams (1⅓ cups) cool water (55 to 65 degrees F) Canola oil, for greasing

Equipment: 8½-by-4½ -inch loaf pan

Whisk the flour, salt, and yeast in a large bowl. Stir in the water and knead with a rubber spatula until a ball forms. Make sure it is sticky to the touch. If it is not, stir in 1 to 2 tablespoons more water.

Cover the bowl tightly with plastic wrap and set in at room temperature (about 72 degrees F) for 18 to 24 hours until more than doubled in size.

One hour before baking, grease an 8½-by-4½ -inch loaf pan with oil. Dust a work surface with flour. Scrape the dough from the bowl onto the floured surface and knead about 10 times, until the dough is no longer sticky. Pat into a 9-inch square, then fold the left third of the dough over the center third. Fold the right side of the square over the folded left and center third. Invert the dough into the greased pan, seam-side down.

Cover the pan loosely with plastic wrap and let rise at room temperature for 1 hour, or until doubled in size.

Preheat the oven to 450 degrees F at least 30 minutes before baking. Remove the plastic wrap from the dough. Use a knife to make a slash down the center of the bread, then dust the loaf with flour. Bake for 30 to 35 minutes, until golden-brown and the loaf sounds hollow when you tap on it. (Or check with a thermometer to make sure the inside reads 160 degrees F.) Let cool before slicing.

 
Easy Homemade Ricotta
 

Anyone who’s shared a home (or test kitchen) with me knows I have a weakness for cheese. If there’s a nutty alpine-style wedge or a round of creamy Bonne Bouche in the fridge, I can’t avoid its siren-call for one meal. (Sorry to those whose Cheddar has ever gone missing…) But, other dairy products languish in my refrigerator without a thought. I buy a quart of yogurt or pint of sour cream for a recipe, only to find colonies of mold coating the leftovers.

Ricotta has gone the same way of yogurt and sour cream, despite its technical categorization as cheese. Most store-bought brands have a spongy texture and a bland flavor, plus they are usually rife with stabilizers. (The one exception I know is Salvatore Bklyn ricotta, which is smooth and rich, but it's pricier.)

Then, my friend’s mom hired me to teach a cooking class to eight middle schoolers. I included no-knead sandwich bread and homemade ricotta in the curriculum. Ricotta is a fun, kid-friendly project that has a great aha moment: pouring the acid in causes the curds to separate from the whey in a matter of minutes. Ladle the curds into a cheesecloth-lined strainer set over a bowl and you’ve got ricotta. (The whey is a great swap for water in the no-knead bread recipe. Save it for up to 1 week.)

One taste of the homemade variety and I was hooked. I slathered it on warm toast, drizzled with a peppery olive oil, and showered it with flaky sea salt and freshly ground black pepper twice daily until the batch was gone.

Even though it’s easy and quick to make, the real reason to DIY ricotta is for the pure milk flavor with a bright, lemony tang. A note on ingredients: it’s worth splurging on high-quality organic milk. If you have a dairy stand at the farmers’ market, now is the time to indulge. This is about highlighting quality, otherwise there’s a yellow tub with your name on it at the store.

Serve this drizzled with oil and crackers, ideally with prosciutto, salad, and your other favorite sides nearby. Oh, and pour some rose, beer, or whatever your favorite drink is, too.

Homemade Ricotta Makes about 1 quart

Ingredients 12 cups whole milk 2 cups heavy cream ½ cup fresh lemon juice (you can also use distilled white vinegar) 2 teaspoons salt

Equipment: Cheesecloth, strainer, large pot, candy thermometer or an instant-read thermometer

Line a strainer with triple-folded cheesecloth. Set over a large bowl. Set aside.

Combine the milk and cream in a large pot over medium heat. Clip a candy thermometer to the side of the pan, if you have one. Warm the milk to 200º F. (This should take about 20 minutes.) Remove from the heat; stir in the lemon juice and salt. When the curds have separated from the whey, about 10 minutes, ladle them into the cheesecloth-lined strainer. Pour the remaining whey into the strainer and save for bread or discard.

Let drain until ricotta reaches the desired consistency, about 45 minutes to 1 hour. Transfer to an airtight container and refrigerate. Ricotta will keep for up to 1 week.

 
Raw Spring Salad with Asparagus and Radishes
 
spring-salad-with-radishes-asparagus-and-scallions.jpg

Perfectionism has been getting in the way of this blog. I have been working on a German Chocolate Cake cookie that has gone through FOUR iterations, and it still has one last test to go. I’ve been missing writing, and I’ve been missing sharing recipes with you. ("You" meaning hopefully someone in addition to my mom.)

I’ve been obsessing about how to get that cookie right, (this seemsto be a habit by now…) and along the way I forgot that sharing a simple salad recipe in the vein of Nigel Slater is sometimes enough. Do you know Nigel Slater’s books yet? They are so beautiful and give a sense of place without the visual clutter of unnecessary props and stylized backgrounds. His easy-going, natural prose draws me in each time I open Ripe or Tender, and Jonathan Lovekin’s photographs offer a sultry complement to Nigel’s (can I call you Nigel, Nigel?) personal recipes.

Other places to find the same lovely qualities are on Molly Wizenberg’s blog, Orangette and in Luisa Weiss’s blog The Wednesday Chef. They are all personal but not self-obsessed; open but not over-sharing. Plus, their photographs are moody and gorgeous. (I’m also a big fan of their memoirs, which you can find here and here, respectively.)

Anyway, have you ever read food writing that describes a food "as begging for" something? Like, the bread was begging to be toasted. The ramps were begging for a slick of olive oil. I have never heard my food beg me to do anything other than scarf it down with haste, but this is as close as it’s ever gotten to human-plant ESP.

Finally, fresh vegetables line the farmers’ market stalls, practically begging to be tossed into a fresh spring salad. Oops — did I say begging? Well like I said, magenta radishes, snappy asparagus stalks and fuchsia scallions got as close to a whisper in my ear that any food as ever gotten.

So yes, this recipe is easy. Slice the radishes, asparagus, and scallion thinly to let them soak in the olive oil and lemon juice. Play with the proportions as you like. More quinoa and add lettuce for a stronger salad vibe. Swap the blue cheese for goat cheese. You get it.

Lastly,a question for you: Do you like casual, easy recipes like this? Or are you looking for more specific directions. Please share your thoughts and comments below!

spring-salad-with-radishes-asparagus-mint-and-quinoa.jpg

Raw Spring Salad with Asparagus and Radishes Serves 1 to 2

4 radishes, thinly sliced 6 stalks asparagus, thinly sliced on the bias 1 small scallion, thinly sliced A few tablespoons extra-virgin olive oil Juice of half a lemon Flaky sea salt and freshly ground black pepper 10 to 15 mint leaves, torn 1 cup cooked quinoa 2 ounces soft blue cheese, crumbled

Toss the radishes, asparagus, and scallion in a bowl. Drizzle with a little olive oil and the lemon juice and toss to coat. Add more olive oil if desired. Season to taste with salt and pepper and fold in the mint leaves. Serve over cooked quinoa and dollop with blue cheese.

 
The Ultimate Cream Cheese Brownie Recipe
 
swirled-batter-closeup-text-2.jpg

Creating a new baking recipe can sometimes feel like Groundhog Day. Not February 2nd, but the Bill Murray movie, which carries lessons for life, love, and apparently recipe developing.

The first time I make a recipe, I happily measure, mix, and stir as my way towards a new creation. The second time, frustrated and fearful of a long process, I rush through, anxious to get to the other side and hopeful that it works out. Here is where it might be easy to call something good enough and move on. But, what is the point of putting another recipe out into the world if it's not just right? I pull the sugar and flour containers back out and get started on batch #3. This one turns out perfect! But wait, the brownie layer is meekly thin and overpowered by the cream cheese top.

Now, I'm making the same recipe for the fourth time, and I'm questioning the entire process of blogging and recipe development as I spoon and level my flour. What is the point of putting another brownie out there? Will anyone appreciate the three pounds of butter, four pounds of chocolate and countless cups of sugar that have gone into perfecting this recipe?

brownie-beauty.jpg

Just as I'm hitting a low, waiting for the last batch to come out of the oven, I remember: The point of blogging or creating a recipe (or doing whatever you feel pulled towards doing) is to put something into the world because something in you needs to. (Check out Elle Luna's great article The Crossroads of Should and Must for more on this.)

I fixated on my ideal cream cheese brownie and I feel like I finally nailed it. Pockets of tangy cream cheese dip through each bite of cake, which is studded with pockets of melted chopped chocolate. The ratio of top to bottom is well-balanced: about 1/3 cream cheese to 2/3 chocolate. Finally, I'm released from the repetitions and ready to share the recipe.

brownie-grid.jpg

I've been working on my brownie recipe for years, and the base of this one has grown out of countless tests, tweaks, and revisions.  The topping is inspired by a Cook's Illustrated recipe and I drew on their method for swirling the chocolate batter in without too much mixing. The secret is pulling out a 1/2 cup of batter before adding the cream cheese layer. After scraping the remaining batter into the pan, you top it with the cream cheese mixture. Smooth this out almost to the edges, then dollop with the remaining 1/2 cup batter. Then, use a chopstick or the tip of a butter knife to swirl the batter into the cream cheese.

finished-swirl-and-final-brownie.jpg

I could look at those swirls all day. They are mesmerizing! There's something so satisfying about creating something that is not only delicious, but beautiful. Now what are you waiting for? Time to get swirling!

grid-of-brownies.jpg
––
Big Update! Hi Mostess readers! If you've been following me on Instagram, then you know that I've been working on a cookbook for a long time. It's called Healthyish and will be out on January 9th, 2018!
I've also launched a new website that showcases my published recipes and will serve as a hub for all work I do going forward (including a new recipe blog.) Check out LindsayMaitlandHunt.com and let me know what you think!
––

The Ultimate Cream Cheese Brownie Recipe Recipe by Lindsay Maitland Hunt

Makes 24 brownies

Ingredients

For the cream cheese topping: 8 ounces cream cheese 1 cup sour cream, at room temperature 2 tablespoons all-purpose flour 2 tablespoons granulated sugar 1 teaspoon pure vanilla extract ¼ teaspoon fine salt

For the brownies: 3 sticks unsalted butter, cut into 1-inch pieces, plus more for the pan 1 cup plus 2 tablespoons all-purpose flour, spooned and leveled ¾ cup natural cocoa powder (not Dutch-processed) 2 ¼ teaspoons fine salt 1 ½ teaspoons baking powder 6 ounces unsweetened chocolate, chopped (1 cup) 1 ½ cup granulated sugar 1 ½ cup packed dark or light brown sugar (dark is recommended) 6 ounces semisweet chocolate, chopped (1 cup) 5 large eggs, at room temperature 2 teaspoons pure vanilla extract

Make the cream cheese topping

Warm the cream cheese in the microwave or in a saucepan over low heat, whisking frequently. The cream cheese should be completely smooth with no lumps remaining.

Transfer to a medium bowl and whisk in the sour cream, flour, sugar, vanilla, and salt. Set aside.

Make the brownies

Preheat the oven to 350º F with a rack set in the center. Butter a metal or glass 9-by-13-inch pan. Line with parchment paper with two flaps overhanging on the sides long, then butter the parchment.

In a medium bowl, whisk the flour, cocoa, salt, and baking powder; set aside.

Combine the unsweetened chocolate and butter in the top of a double boiler set over a pan of simmering water. Cook, stirring frequently, until the chocolate and butter are completely melted, 3 to 5 minutes. (You can also do this in the microwave)

Transfer the chocolate-butter mixture to a large bowl. Whisk in both sugars and scrape down the sides with a rubber spatula. Add the eggs one at a time, whisking until incorporated and scraping down the sides as necessary. Stir in the vanilla.

Sprinkle the flour mixture over the chocolate mixture and whisk until just combined. Fold in the semisweet chocolate. Remove ½ cup of the batter and set aside. Scrape the remaining batter into the prepared pan and smooth with an offset spatula.

Dollop the cream cheese mixture evenly over the brownie batter. Smooth with a clean offset spatula. Dollop the remaining brownie batter on the cream cheese layer. Use a chopstick or the tip of a butter knife to swirl the batter and cream cheese. Do not overmix.

Bake the brownies, rotating once, until a toothpick inserted in the center comes out clean, 50 to 55 minutes. Let cool completely before cutting into 24 squares.

 
Chunky Whole-Grain Miso Cookies with Pistachios, Sesame, and Dried Apricots
 
whole-grain-miso-chunk-cookie1.jpg

If this were another blog, the title of this post would probably be "On overcoming personal struggles and learning to live a new life" or something along those lines. But, since it's a food site, there's a cookie recipe with a side of life lessons.

On a chilly Friday in February one year ago, I was living in Manhattan, working at Real Simple, and making recipes that appealed to the magazine’s broad demographic (aka delicious crowdpleasers). But most importantly, I had the first in a series of year-long, debilitating chronic migraines. Thus began an arduous journey to get to the bottom of the headaches. I tried my traditional method of strong-arming my way towards success, but as anyone who’s had a migraine knows, that just doesn’t work. I waited for the pain to pass, but day in and day out, it kept me company like the worst of frenemies. I couldn’t kick it.

If you had told me then, that twelve months later I would be sitting at home in Brooklyn, working freelance, mostly migraine-free, and baking a celebration miso cookie (read: non crowd-pleaser), I couldn’t have believed it. It’s been a long journey, filled with about 40 different doctors and a lot of biofeedback and acupuncture, but I’m finally here, cookies in hand.

I’m still figuring out how to write about the past year. As I process it, I keep returning to my favorite passage at the end of Wild, Cheryl Strayed’s memoir about hiking the Pacific Crest Trail. (Wild is in theaters, now, and it’s fantastic, but I recommend reading the book first as well as Tiny Beautiful Things, Strayed’s compilation of her incredible Dear Sugar columns.) Skip ahead if you don’t want to read the last few paragraphs of Wild. She writes:

“After he drove away, I leaned my head back and closed my eyes against the sun as the tears I’d expected earlier at the bridge began to seep from my eyes. Thank you, I thought over and over again. Thank you. Not just for the long walk, but for everything I could feel finally gathered up inside of me; for everything the trail had taught me and everything I couldn’t yet know, though I felt it somehow already contained within me. How I’d never see the man in the BMW again, but how in four years I’d cross the Bridge of the Gods with another man and marry him in a spot almost visible from where I now sat. How in nine years that man and I would have a son named Carver, and a year and a half after that, a daughter named Bobbi. How in fifteen years I’d bring my family to this same white bench and the four of us would eat ice-cream cones while I told them the story of the time I’d been here once before, when I’d finished walking a long way on something called the Pacific Crest Trail…“...It was all unknown to me then, as I sat on that white bench on the day I finished my hike. Everything except the fact that I didn’t have to know. That it was enough to trust that what I’d done was true. To understand its meaning without yet being able to say precisely what it was, like all those lines from The Dream of a Common Language that had run through my nights and days. To believe that I didn’t need to reach with my bare hands anymore. To know that seeing the fish beneath the surface of the water was enough. That it was everything. It was my life—like all lives, mysterious and irrevocable and sacred. So very close, so very present, so very belonging to me.“How wild it was, to let it be.”

I went through a lot of ups and downs adjusting to self-employment and trying to get over migraines, days where I hardly left the apartment and worked in complete solitude, or days where I was in too much pain to get up. But, as I struggled to find answers, I found the capacity for a new level of creativity, the ability to jettison fear, a new habit of welcoming the unpredictable (both miso cookies and health setbacks alike) and living with joy.

So, I’m celebrating in my favorite way, by baking. I wanted to make something weird and out of the ordinary, like my past year. These began as a haywire riff on my oatmeal raisin recipe, eventually turning into a kooky distant relative that boasts a hit of umami-rich miso, and a mix of whole grains, nuts, and seeds.

One bite vibrates with rich flavors: dark brown sugar and dried apricots boost the caramel undertones while sesame seeds and roasted pistachios amplify the miso’s nuttiness. This unusual cookie is not going to be everyone’s favorite, but it might knock the socks off a few tasters.

Cheers!

stack-of-whole-grain-miso-cookies-with-pistachios-and-apricots.jpg

Chunky Whole-Grain and Miso Cookies Recipe by Lindsay Hunt

Makes 2 dozen cookies

Ingredients: 1 cup whole wheat bread flour (140g) or: use 1 ¾ cups whole wheat or all-purpose flour in place of the bread and cake flours) ¾ cup cake flour (96g) ¾ cup wheat bran (37g) 1 teaspoon baking soda 1 pinch fine salt 2 teaspoons ground ginger 1 cup toasted chopped pistachios, chopped ½ cup old-fashioned rolled oats (150g) 1 cup dried apricots, chopped (260g) ¼ cup white or black sesame seeds (or a mixture of both), plus additional for sprinkling 2 sticks (1 cup) unsalted butter, at room temperature 1 cup packed dark brown sugar (200g) 3/4 cup granulated sugar (170g) 2 tablespoons white miso paste 2 large eggs plus one egg yolk (for garnish), at room temperature 1 teaspoon pure vanilla extract

Equipment: Two baking sheets, ideally without rims, parchment paper or nonstick cooking mats such as silpat, an airtight container to store the cookie dough in, and a digital scale (if you have one)

Combine the flours, bran, baking soda, salt, and ginger in a medium bowl. Whisk until thoroughly combined. Stir in the oats, pistachios, sesame seeds, and apricots; set aside

Place the butter, sugars, and miso in the bowl of a stand mixer fitted with the paddle attachment (or use a hand mixer). Cream on medium-high speed until light and fluffy, 3 to 4 minutes. Stop the mixer occasionally and scrape down the sides and paddle with a rubber spatula.

Add the two whole eggs and vanilla and mix on medium speed until well combined, about 1 minute. Add the flour mixture and mix on low speed until just combined, about 30 seconds.

Transfer the dough to an airtight container and refrigerate at least 2 hours, but preferably 24 to 72 hours.

30 minutes before baking, preheat the oven to 350º F. Line two baking trays with parchment paper or silicone mats.

Portion the dough into 2-ounce (55 gram/2 heaping tablespoon) scoops. Roll gently with your hands into balls. Space the dough 3 inches apart on each tray, about 8 to a tray. Flatten gently with your hand.

Brush the remaining egg yolk onto the prepared cookies, dividing evenly. Sprinkle with additional sesame seeds.

Bake for 18 to 22 minutes, rotating the trays front to back and top to bottom halfway through. Pull the cookies out when they look just set—they will continue to cook when they come out of the oven. They will not be mostly blonde with small spots of golden brown. They will turn completely golden brown as they cool on the cookie sheets. (**Timing may vary based on the size of your cookies, how cold the dough is, and your oven.)

Cool the cookies on the sheets for 5 minutes, then transfer to a wire rack to cool completely. Cookies will keep in an airtight container for up to 3 days.

Goodbye from the bottom of this seed-studded cookie!

bottom-of-miso-cookie.jpg
 
Winterfresh Salad with Roasted Sunchokes
 
winterfresh-salad-with-roasted-sunchokes.jpg

Circa-midwinter, after all the holiday cheer, I usually want to hunker down with chunk of bread pudding, a steaming bowl of stew, and as many simple cakes as my oven will fit. But, this January, I’ve been doing an elimination diet to diagnose any hidden food allergies, which has stolen my trusty sidekicks away. This means no cheese, no eggs, no sugar, no prosciutto, no lemons.

So what’s a comfort-food-loving girl to do? It turns out that eating healthily in the winter doesn’t just have to be a bowl of quinoa topped with beans and half an avocado (though, that’ll do on most days). Sometimes, it’s nice to forget winter entirely and make something light, crisp, refreshing—and dare I say it?—summery.

Beneath the vibrant hues of carrot, radish, and snap pea in this recipe there is one tuberous winter star: nutty, roasted sunchokes. Alongside the raw vegetables they offer a grounding, earthy balance. The key to great sunchokes is a lot of oil—more than you might be comfortable with at first, but please withhold judgment until you try one—and letting them become so meltingly tender, they flatten with the gentlest squeeze.

I’m not going to pretend this is an “easy, fast meal!” because it will take some time and knife skills or a mandoline. Don’t rush it. Lean into the faux-July vibe with a beachy soundtrack and let the chopping begin. I recommend prepping the sunchokes first and letting them do their thing in the oven while you slice the remaining vegetables.

And, if you’ve never tried a watermelon radish before, it’s time. Aren’t they stunners? (See below.) It’s a sweeter, milder version of the peppery, small variety you normally see in the market. If you can’t find the watermelon kind, any other radish type will do.

Once the salad's ready, heap some into your favorite deep bowl, perch yourself window-adjacent, and peer out at a (hopefully) bluebird sky. For just a second, you might forget it’s actually frigid beyond the pane. I know I did.

watermelon-radishes.jpg

Winterfresh Salad with Roasted Sunchokes By Lindsay Hunt

Serves 4 to 6

1 pound sunchokes (also called Jerusalem artichokes), well scrubbed and mostly peeled, cut into 1-inch pieces ¼ cup olive oil, plus additional to taste Kosher salt and freshly ground black pepper 1 small head napa cabbage, thinly sliced 2 carrots, thinly sliced lengthwise with a vegetable peeler 1 watermelon radish, very thinly sliced 2 cups snap peas, sliced White balsamic or white wine vinegar, to taste

Heat the oven to 400º F. Toss the sunchokes with ¼ of the olive oil, ¾ teaspoon salt, and ½ teaspoon pepper. Roast, tossing occasionally, until very tender, 25 to 30 minutes.

Meanwhile prep the vegetables as listed in the ingredients list. Toss them in a large bowl with olive oil, vinegar, salt, and pepper to taste. Use clean hands to massage the vegetables, particularly the cabbage, so they tenderize.

When the sunchokes are roasted, let cool slightly, then use a slotted spoon to transfer to the salad bowl. Toss together and serve.

 
Spiced Cardamom and Rye Waffles
 
spiced-cardamom-and-rye-waffle-recipe.jpg

There's something magical about having waffles for breakfast. Starting the day with such a luxurious tone can only lead to good things, I think. Typically, I am the happy recipient of whatever waffles my mom whips up when I am visiting -- usually crunchy, Belgian-style grids that are light and airy. This Christmas when I was home, I decided to mix it up.

The result is something a little denser, with a toothsome bite from whole grains and ample spices to toast a gloomy winter day. Cardamom's fragrant notes match up perfectly with earthy rye flour. True, there's only 1/4 teaspoon in the recipe, seemingly not enough to either perfume the batter or give it top billing in the title. I promise that little bit will shine through in just the right way before hitting that metallic too-much-cardamom taste. As for the rye, Bob's Red Mill sells dark rye flour if you don't have some already on hand.

These make for the perfect wintery weekend brunch, preferably with fat snowflakes falling slowly outside, but I'll leave that part up to the weather.

Spiced Cardamom and Rye Waffles Serves 4

6 large eggs, separated 1 ½ cups buttermilk ½ stick (4 tablespoons) unsalted butter, melted and cooled to room temperature 2 teaspoons pure vanilla extract ¾ cup all-purpose flour, spooned and leveled ¾ cup dark rye flour, spooned and leveled ¼ cup granulated sugar 2 teaspoons ground cinnamon 1 teaspoon fine salt 1 teaspoon ground ginger 1 teaspoon baking powder 1 teaspoon baking soda ¼ teaspoon ground cardamom Salted butter, maple syrup, and sliced banana, for serving (optional)

Special Equipment: Waffle maker, egg white beaters (optional)

1. Preheat a waffle maker on highest setting.

2. Beat the egg whites in a small bowl with an egg beater, whisk, or an electric mixer fitted with the whisk attachment until stiff peaks form. You should be able to lift your whisk or beater, turn it upside down, and the egg whites should stand straight up. Set aside.

3. Whisk the egg yolks, buttermilk, melted butter, and vanilla in a medium bowl until well combined. Set aside.

4. Whisk the all-purpose flour, rye flour, sugar, cinnamon, salt, ginger, baking powder, baking soda, and cardamom in a large bowl until well combined. Whisk in the egg yolk mixture until almost incorporated—it’s okay if some lumps remain. Add the egg whites and fold with a spatula until just combined. Do not over mix!

5. Spread about 1 heaping cup on the heated griddle, spreading from the middle outwards. Cook until done according to your waffle maker’s instructions. Repeat with remaining batter and serve immediately with butter and maple syrup, or your favorite accompaniments.

 
How to Decorate Sugar Cookies (Plus Your Essential Toolkit!)
 

Decorating sugar cookies is one of my favorite holiday activities. I love sitting down for an afternoon of icing and sprinkles. Once you have your batch of sugar cookies ready to decorate, it’s time for the fun part. Choose from three icing recipes (based on what you already have in your pantry) and set up your toolkit for cookie success. Let’s get started!

If you’re home with family for the holidays, I recommend getting everyone involved. For the past three years, my mom, sister, and I have decorated 200 cookies for our holiday party. Sitting together and chatting while we’re icing is fun catch-up time, and it’s inspiring to see the different designs we each come up with.

If you’re alone, I highly recommend queuing up a few podcasts to keep you company. I got through about ten episodes of Serial and Inquiring Minds during my recipe development for this post.

If you read my sugar cookie recipe post, you know I have a lot to say about best practices. This is another long post. I wanted to share everything I’ve learned over the past three years so you can have great success! With that in mind, I’m going to jump past storytelling and science to get right to the how-to.

About my icing recipes:

When it comes to something like the icing on a sugar cookie, taste isn’t a paramount concern. The icing is usually covered by sprinkles and/or spiked with food coloring. It’s all about ease for me. I want it to come together quickly with things I have in my pantry and I want it to be easy to pipe on the cookies.

Regarding food coloring: I like to decorate with white icing and use various sprinkles as my color. If you do want to use food coloring, choose your recipe below, then divide the final batch into separate bowls and color as desired.

Make measuring easy! A standard 1 pound box of confectioners sugar equals 3 ¾ cups. All recipes assume you are using one box. If you have a large bin in your pantry, weigh 1 pound or measure 3 ¾ packed cups.

Okay, commence the icing choose-your-own-adventure!

Here's what the consistency of your icing should look like when you lift the whisk out of the bowl. Slightly runny but not watery:

royal-icing-consistency2.jpg

Royal Icing with Egg Whites This produces an icing with the trademark glossy sheen of a good royal icing. It’s easy to make, since you likely have 3 eggs sitting in your fridge. The concern here is using raw egg whites, which can be a health concern for some. You can solve this by buying pasteurized eggs (they exist!) or using meringue powder.

Make the icing: Combine 1 lb. (3 ¾ cups) confectioner'ssugar with 3 large eggwhites in the bowl of an electric mixer fitted with the whisk attachment (or use a handheld mixer). Whisk on medium-high until peaks form. Thin as needed with 1 teaspoons of water at a time until the icing looks glossy and bright white.

Royal Icing with Meringue Powder Meringue powder is made from powdered egg whites and is my favorite pick to make royal icing. You’ll still get the volume and body of an egg white-based royal icing, but without health concerns of raw eggs. Plus, meringue powder is inexpensive and can keep in your pantry for years. This is a great option for health safety and that classic look, but requires getting an extra ingredient from the store.

Make the icing: Combine ½ cup meringuepowder with ½ cup water in the bowl of an electric mixer fitted with the whisk attachment (or use a handheld mixer). Whisk on medium-high until peaks form. Add 1 lb. (3 ¾ cups) confectioner'ssugar and beat until well combined. The mixture should look glossy and bright white. Thin as needed with 1 teaspoon of water at a time.

Milk-based Icing (Egg-Free) Technically, a royal icing has to contain eggs, so this super simple version is just an icing. It doesn’t have the brilliant white shine of the egg-based royal  but it is so easy. I recommend this version if decorating with kids or if you want to quickly decorate a batch. This recipe is good for anyone with egg-allergies or who doesn’t want to buy a special ingredient or use raw eggs.

Make the icing: Combine 1 lb. (3 ¾ cups) confectioner's sugar and ¼ cup milk in the bowl of an electric mixer fitted with the whisk attachment (or use a handheld mixer). Whisk on medium-high until the mixture is completely smooth with no lumps remaining. Add 1-2 tablespoons milk, until the mixture is easily pourable but not too runny.

When you lift whisk out of the mixture, the icing should slowly run off the end, not pour too quickly. If you have added too much milk, just add some more confectioners sugar.

cookie-decorating-tool-kit.jpg

Your Decorating Tool Kit

Once you have the cookies and the icing ready, a few tools make decorating easy and efficient. I have SweetDaniB, a cookie-decorating guru, to thank for teaching me about how to decorate a cookie well, and what is helpful to keep on hand (more about her in my sugar cookie post). Check her site and instagram out for inspiration.

Squeeze bottles vs. Pastry bags I use small squeeze bottles to decorate my cookies. They are reusable, easy to refill, and easy to handle. Pastry bags, particularly plastic ones, are fine to use, but I find they create extra mess. I particularly like accordion-style squeeze bottles like these from Kuhn Rikon. If you do use a squeeze bottle, I recommend keeping it inverted it in a sturdy glass or mug between piping, so the frosting is easy to squeeze out.

Surgical Tweezers For intricate designs and accurate placement, an inexpensive pair of surgical tweezers are indispensable. Amazon stocks inexpensive ones.

Offset Spatula After piping icing into your desired shape, an offset spatula allows you to smooth the icing to evenly fill the shape. I also use a clean offset spatula to gently press  and jimmies into the icing to firm up an edge.

Toothpicks What can’t this kitchen workhorse do? A box of toothpicks is inexpensive and will see you through testing cakes, hors d’oeuvres, and now, cookie decorating. Use to smooth icing, as with the offset, above, to fill up a design or smooth an edge.

Paper plates Decorating on top of a paper plate allows you to save the sprinkles that don’t attach to the icing. After the sprinkles have covered the icing, move the cookie aside, fold the plate into a funnel-like shape and pour the remaining sprinkles back into the original jar. Repeat with fresh icing and sprinkles.

Rimmed baking sheets It’s a constant battle between my creative artist side and my inner neat freak when it comes to decorating cookies. I love the explosion of colors and shapes and it can be fun to let loose and see what fun designs you can create. However, nonpareils have a sneaky way of rolling amok. Decorating with all your tools inside a rimmed baking sheet keeps the mess at bay.

sugar-cookie-inspiration.jpg

How to ice the cookies:

Now that you’ve read through all of the above, I hope it doesn’t seem too daunting. To ice is actually quite simple.

For a lined design: Squeeze or pipe the frosting into your desired design, pour the sprinkles on top, remove the cookie, fold the paper plate and pour the sprinkles back into the bottle, and repeat.

For a filled design: Pipe the outline of the shape. Then, pipe even zigzags of icing inside the shape to fill. Smooth with an offset spatula or toothpick, then pour sprinkles over the icing. Remove the cookie, fold the paper plate and pour the sprinkles back into the bottle, and repeat.

To create different areas of color, sprinkles, etc: Pipe the first area, decorate with sprinkles, then let dry for at least 20 minutes. If the icing is still wet at all, the other color of nonpareils will find a home in the already iced portion.

A big note for ultimate success!: Do not pipe your icing too close to the edge of the cookie. Start with a ¼-inch border until you feel more confident with your technique. Sprinkles will weigh the frosting down and push it towards the sides. If you do have frosting that runs down the sides, don’t panic. Use a toothpick or an offset spatula to scrape along the cookie, perpendicular to the edge. (I actually love this look and use it often now.)

Good luck and have fun!

 
Easy Holiday Sugar Cookie Recipe and Tips
 
lemon-and-vanilla-sugar-cookies-mostess.jpg

Happy holidays, Mostess readers! I'm excited to share the results of my three-year obsession with perfecting the sugar cookie. It's a long post, because I wanted to share all my tips and techniques for success. If you are well-versed in Sugarcookiedom and "just want the recipe already!" then skip on down to the bottom of the post. For novices and baking nerds alike, read on.

How I became obsessed

Until three years ago, I had never decorated a sugar cookie. Maybe I'd adorned a gingersnap with a casual sprinkle somewhere along the line, but never with any purpose or focus. Then, at Real Simple, I was in charge of an enormous roundup of all the best sugar cookie decorating products. Everything from cutters to sprinkles to the best store-bought icing. As part of this project, which took five months and some 1,000 different bottles of sprinkles, I was lucky enough to hire Sweet Dani B, a master of cookie decorating, to decorate the trial cookies and our final shoot cookies. I spent two full days sitting by her side, learning the tricks of icing and applying sprinkles. (For more on decorating, check out my guide to cookie icing and your essential toolkit.)

After learning how fun and easy it was to transform this blank canvas, I was hooked. I made 150 cookies the first year to test out my skills, 300 last year, and this year, I don't even want to know how many I've gone through. All to get to the perfect cookie that's not too buttery (which causes the dough to spread and lose its shape,) easy to work with, but not too tough.

You may have noticed that I titled this post "easy" cookies. None of the steps are difficult, but they take some focus and planning. I promise the results are well worth it. Between cookie #1 and cookie #500 I learned a lot of lessons the hard way so you won't have to. Here are my tips for maximum cookie success!

The 5 Mostess Sugar Cookie Tips for Success

1. Chill out! 

The techniques for making sugar cookies are simple, but I’m not going to lie to you and tell you that these aren’t time intensive. Success—meaning straight, clear edges and cookies that don’t morph from snowflake into flower-shaped blob in the oven—requires setting aside time to let the dough chill properly.

Chilling the dough does two things: it relaxes the gluten in the cookies, (more on this in my oatmeal-raisin cookie post,) but what is more important here is that it keeps the butter chilled. Warm butter will spread in the oven, making the cookies lose their shape, and they will be hard and not crispy, crunchy perfect.

2. Think ahead.

It may seem like common sense, but prepping your workspace and double checking that you have everything you need are two essential keys to successful cooking and baking, no matter the recipe.

When you are ready to roll out the dough and cut it into shapes, clear out enough space in your refrigerator to store the cookie sheets. I tend to leave this until the last moment and it causes a few knocked-over bottles, etc. Just before rolling, set aside a small bowl with all-purpose flour for dusting. Before cutting the dough out, make sure your cutters are nearby.

3. Be a clean freak.

Rolling dough on a dirty counter means your cookies might pick up specks of food, dust, or eau-de-garlic. Make sure your work surface is extra clean before rolling. I use a vinegar-water mixture to wipe it down just before I start.

4. Give cookies space.

Do not crowd the cookies on the sheet. Despite all the great work you've done to chill the dough adequately, each shape will expand. And, as the cookies bake, the butter releases steam. Too many cookies in the oven leads to a lot of steam, which you don't want. They will take longer to bake, and could end up too hard.

So, give the cookies space on the sheet, and if you can, bake only one sheet at a time, in the center of the oven. (Baking nerds: Check out this fun animation from TEDed about how cookie chemistry works.)

5. Keep an eye on it.

As my good friend Dawn always told me, "America underbakes it's pastry." For some reason this always made me laugh, thinking of the USA as a baker, but it is a truth worth remembering. Underbaked cookies won't be crispy and flaky, which is what you are going for here. Start checking your cookies at 14 minutes and remove them from the oven when just a bit of golden brown rings the edges of the shapes.

All right, enough already! Time to get baking. For icing recipes, tips, and some visual inspiration check out this other post.

classic-sugar-cookie.jpg

Lemon and Vanilla Sugar Cookies by Lindsay Hunt

Makes about 36 cookies

Ingredients: 3 ¼ cups all-purpose flour, spooned and leveled (400g), plus additional for rolling 1 teaspoon kosher salt 1 teaspoon baking powder 2 ½ sticks (10 ounces) unsalted butter, at room temperature 1 ¼ cups granulated sugar 2 large eggs, plus one egg yolk, at room temperature 1 tablespoon pure vanilla extract 2 teaspoons finely grated lemon zest

Equipment: Two baking sheets (ideally without rims), parchment paper or nonstick cooking mats such as Silpat, a digital scale (if you have one), rolling pin, cookie cutters, and a stand mixer or another electric mixer

Make the dough: Whisk the flour, salt, and baking powder together in a medium bowl. Set aside.

Place the butter and sugars in the bowl of a stand mixer fitted with the paddle attachment (or use a hand mixer). Cream the butter and sugar on medium-high speed until light and fluffy, 3 to 4 minutes. Stop the mixer occasionally and scrape down the sides and paddle with a rubber spatula.

Add the eggs, vanilla, and lemon zest and mix on medium speed until well combined, about 1 minute. Add the flour mixture and mix on low speed until just combined, about 30 seconds.

Divide the dough in half and pat into two balls. (You may need to mush them together so they are even and there are no cracks.) Flatten and shape into two 1-inch thick discs and wrap tightly in plastic wrap.

Refrigerate the dough until firm, at least 2 hours and up to 3 days. At this point you can also freeze the dough for up to 1 month.

Roll and cut the dough:

About 45 minutes before you are ready to roll the dough out, remove the dough from the fridge. It has to soften enough to be easy to roll but not so much that it gets too soft and starts to stick to the countertop. Check the dough every 10 minutes or so, when it feels just pliable, it’s ready to roll. This can take anywhere from 20 to 45 minutes depending on the temperature of your kitchen and how long the dough was chilled.

Meanwhile, prepare the cookie sheets and set them next to your work space so they are ready. Working with one disc at a time, roll the dough out on a lightly floured surface until ¼-inch thick. Refrigerate the dough until firm, 20 to 30 minutes. (This is the step you can skip if you are pressed for time).

Return the chilled, rolled dough to the work surface and cut out shapes, placing the cutters as close together as possible. Use a flat spatula, not your fingers, to transfer the cut dough to the cookie sheet, leaving 2-inches between each shape.

Chill the cut dough for at least 20 to 30 minutes and up to 1 hour until very firm. You should be able to pick up a shape with your fingers without it bending at all.

30 minutes before baking, preheat the oven to 350º F with a rack in the middle of the oven. Bake one sheet at a time for 14 to 18 minutes, rotating the tray front to back halfway through. Pull the cookies out when they are golden throughout with golden brown edges.

Let the cookies cool on the sheet for 5 minutes, then transfer to a wire cooling rack to cool completely. If you let the cookies cool completely on the warm baking tray, they will steam and become slightly soggy.

Cookies will keep for up to 1 week in an airtight container.

 
Spiced Carrot Coconut Soup
 
spiced-coconut-carrot-soup.jpg

In December, when I am loading up on cookies and single-handedly demolishing the cheese plate at holiday parties, I find my usual balance of healthy meals and sweets tipping towards sugar overload.

Not to mention, the extra sugar makes me susceptible to the first virus that sweeps through the city. So, why wait for January's resolutions? You can cook a healthy and delicious recipe with immunity-boosting qualities tonight. 

By the way, there's a reason eating a healthy dinner can be a challenge, particularly at this busy time of year. I learned recently that making decisions actually takes more effort as the day progresses, because your brain has used most of its store of glucose. Turns out it's actually harder to choose to make salad instead of ordering in pizza. Keeping a batch of healthy soup on standby takes some work out of the equation.

But what does "healthy" mean? Here, it includes a hearty dose of anti-inflammatory turmeric, stomach-soothing fresh ginger, and calcium-packed carrots. (Turmeric is actually my go-to healing spice now, after a 101 Cookbooks post got me hooked on it.)

While this soup can definitely be vegetarian (just swap the chicken stock for veggie or water), homemade chicken broth has minerals like calcium and magnesium, among other great benefits, so I use it in my version.

Two tips for success: if you have a food processor and like the slicing blade, now is a good time to use it for quick prep. And, don't do like I did and use the coconut milk before mixing. Get a little workout by shaking the can well before opening.

As for the first cold of the season? It's banished. I'm thanking this soup.

Spiced Coconut Carrot Soup by Lindsay Hunt

Ingredients: ¼ cup canola oil 1 bunch scallions, green and white parts only, sliced ¼ to ⅓ cup chopped fresh ginger (use less if you don’t like a lot of heat) 1 teaspoon ground turmeric 1 teaspoon ground coriander 1 teaspoon ground cumin Kosher salt Freshly ground black pepper 1 ½ pounds carrots (about 8 large), peeled and thinly sliced 4 cups chicken stock, preferably homemade, or vegetable stock ½ cup coconut milk Lemon wedges, for serving Toasted pumpkin seeds, for serving Good olive oil, for serving

Equipment: A blender

1. Heat the oil in a large pot over medium-high heat. Add the scallions, ginger, turmeric, coriander, cumin, 2 teaspoons salt, and 1 teaspoon pepper. Cook, stirring often, until the scallions are very soft, about 10 minutes.

2. Add the carrots and stir to combine. Cook, stirring occasionally, until barely tender, about 10 minutes.

3. Add the stock and coconut milk and bring to a boil. Cook until the carrots are very tender, about 10 minutes.

4. Puree in batches in a blender until very smooth. Serve garnished with a squeeze of fresh lemon juice, pumpkin seeds, a drizzle of your favorite olive oil, and extra salt and pepper.

Soup will keep for up to 3 days in an airtight container in the refrigerator.