The Blaaahg

Not just another food blog.
Posts in recipe
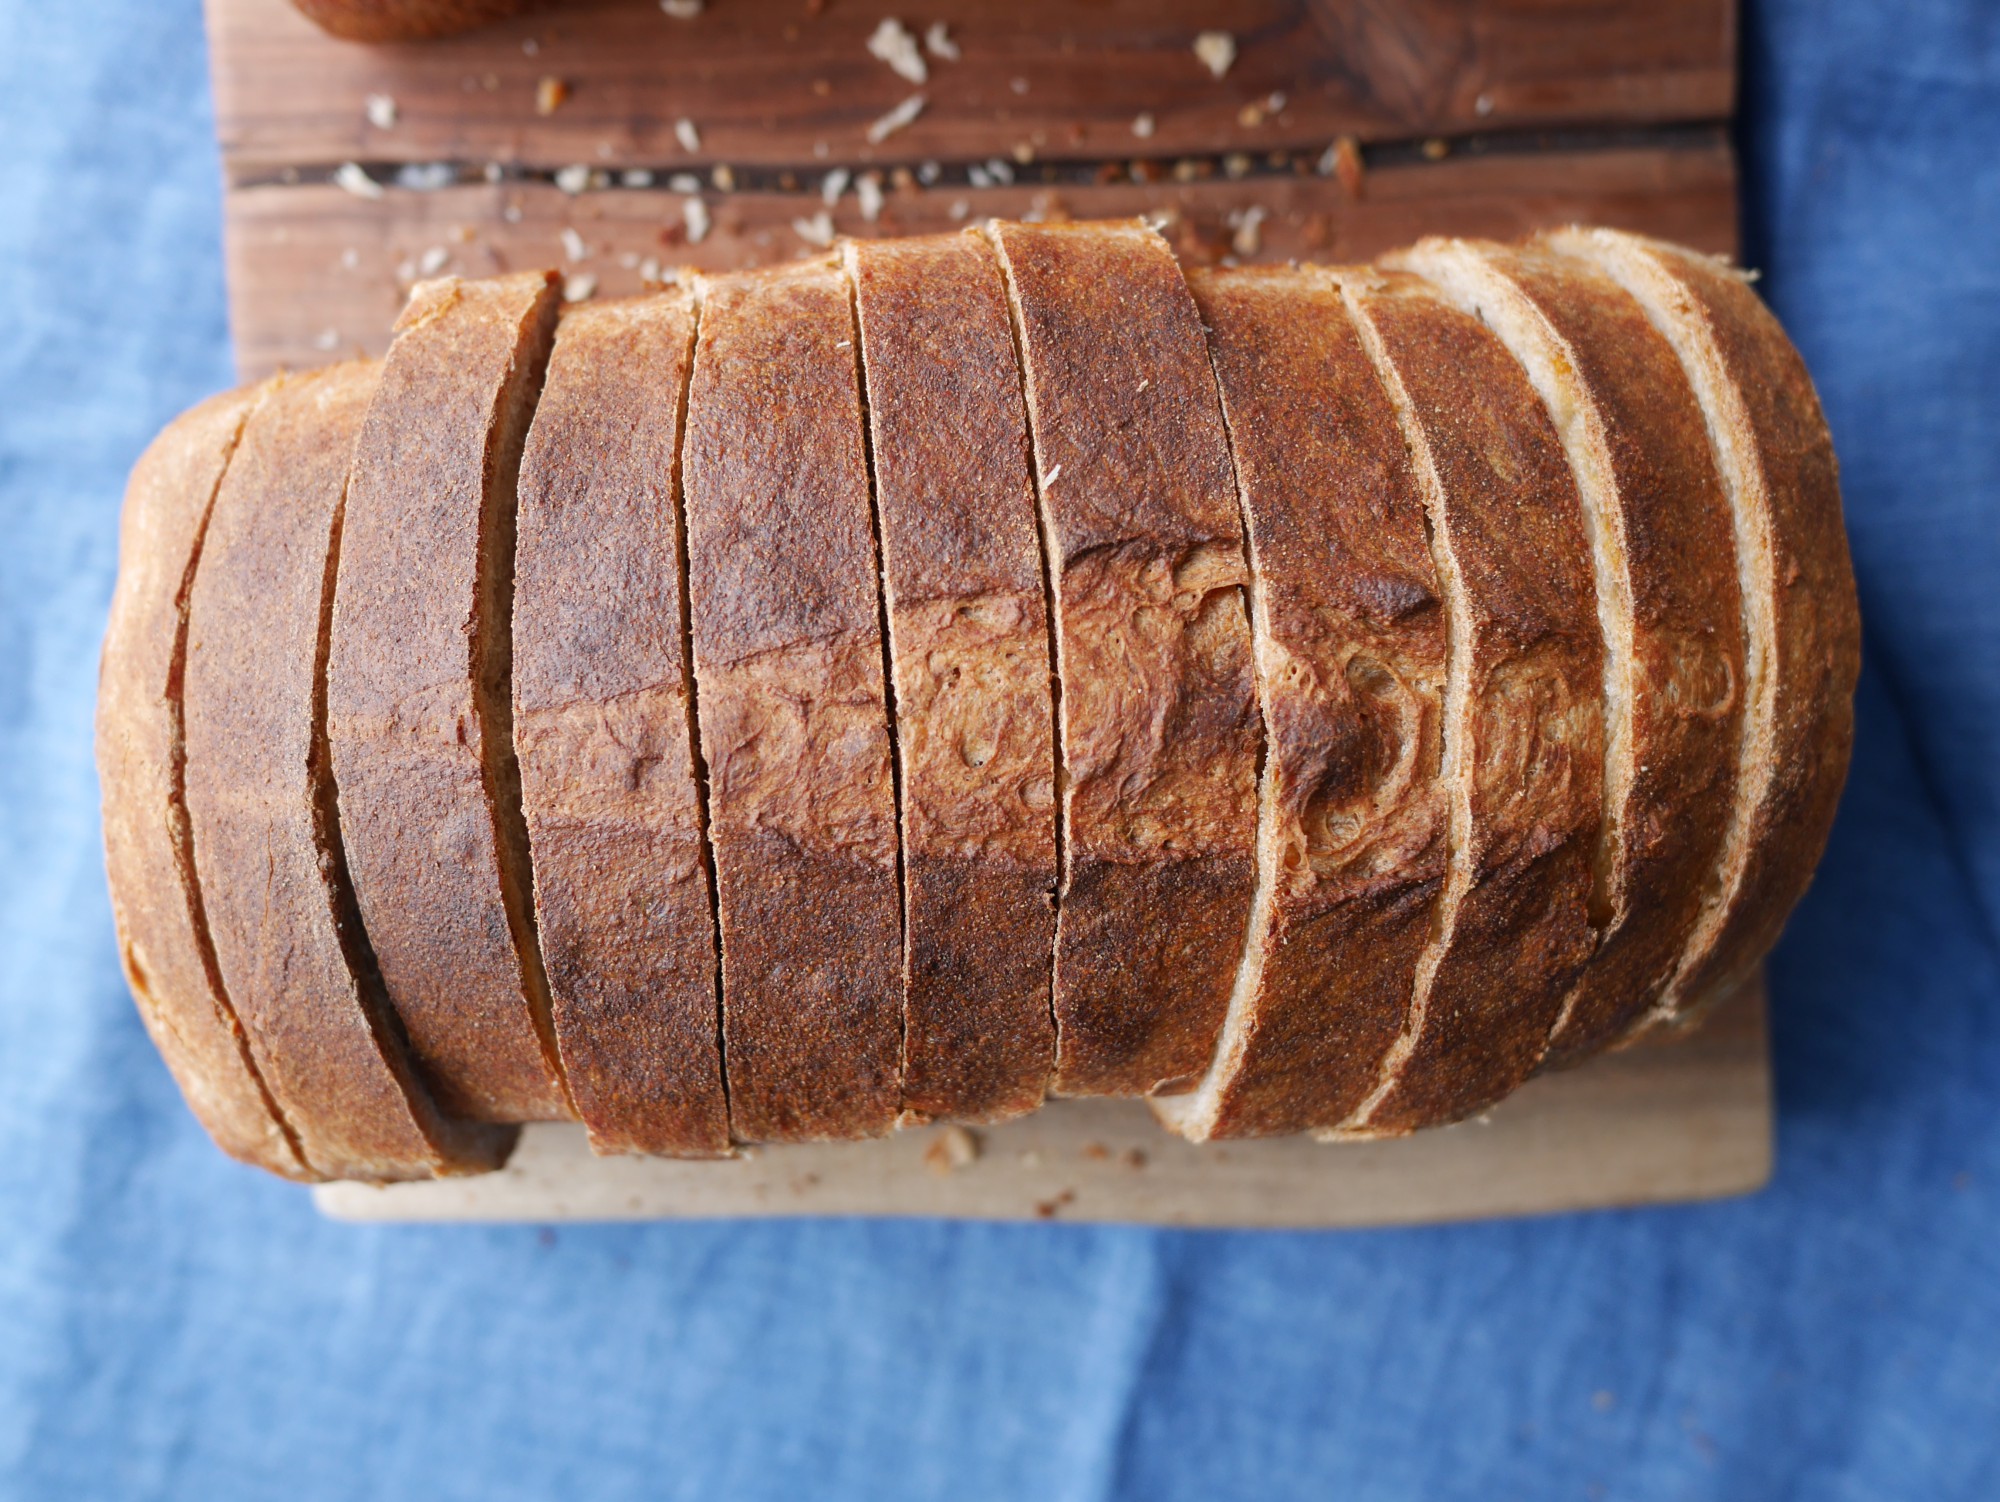
No-Knead Sandwich Bread
 

I've always been a bit intimidated by yeast. Something about the fact that it's a living thing and how easy it is to kill with water that's too hot. The great part about Jim Lahey's no-knead bread method is that you mix the flour, yeast, salt, and water together and let the yeast do their thing. It's a laid back and easy way to make bread and I love it.

Serve this toasted with a schmear of homemade ricotta. I discovered this combination was so addictive this spring, while developing a teaching curriculum for 8 middle schoolers. I adapted this recipe from the original, which needs a covered cast-iron pot and makes a round boule-style loaf. This needs a bit of kneading to help it rise enough in the oven, but not so much it becomes an arm-strengthening production. This allows the dough to rise uncovered (which is different from the original recipe).

Use a digital scale to measure the ingredients, if you can. And, if you made some homemade ricotta, you can save the whey to use instead of the water in this recipe for a nuttier, toastier taste. Just let it cool down completely before using.

p1030382-e1434419486586.jpg

No-Knead Sandwich Bread Adapted from Jim Lahey’s No-Knead Bread

Makes 1 loaf

Ingredients: 400 grams (3 cups) bread flour (ideally half-white half-wheat), plus additional for the work surface 8 grams (1¼ teaspoons) kosher salt 1 gram active dry yeast (¼ teaspoon) 300 grams (1⅓ cups) cool water (55 to 65 degrees F) Canola oil, for greasing

Equipment: 8½-by-4½ -inch loaf pan

Whisk the flour, salt, and yeast in a large bowl. Stir in the water and knead with a rubber spatula until a ball forms. Make sure it is sticky to the touch. If it is not, stir in 1 to 2 tablespoons more water.

Cover the bowl tightly with plastic wrap and set in at room temperature (about 72 degrees F) for 18 to 24 hours until more than doubled in size.

One hour before baking, grease an 8½-by-4½ -inch loaf pan with oil. Dust a work surface with flour. Scrape the dough from the bowl onto the floured surface and knead about 10 times, until the dough is no longer sticky. Pat into a 9-inch square, then fold the left third of the dough over the center third. Fold the right side of the square over the folded left and center third. Invert the dough into the greased pan, seam-side down.

Cover the pan loosely with plastic wrap and let rise at room temperature for 1 hour, or until doubled in size.

Preheat the oven to 450 degrees F at least 30 minutes before baking. Remove the plastic wrap from the dough. Use a knife to make a slash down the center of the bread, then dust the loaf with flour. Bake for 30 to 35 minutes, until golden-brown and the loaf sounds hollow when you tap on it. (Or check with a thermometer to make sure the inside reads 160 degrees F.) Let cool before slicing.

 
Easy Homemade Ricotta
 

Anyone who’s shared a home (or test kitchen) with me knows I have a weakness for cheese. If there’s a nutty alpine-style wedge or a round of creamy Bonne Bouche in the fridge, I can’t avoid its siren-call for one meal. (Sorry to those whose Cheddar has ever gone missing…) But, other dairy products languish in my refrigerator without a thought. I buy a quart of yogurt or pint of sour cream for a recipe, only to find colonies of mold coating the leftovers.

Ricotta has gone the same way of yogurt and sour cream, despite its technical categorization as cheese. Most store-bought brands have a spongy texture and a bland flavor, plus they are usually rife with stabilizers. (The one exception I know is Salvatore Bklyn ricotta, which is smooth and rich, but it's pricier.)

Then, my friend’s mom hired me to teach a cooking class to eight middle schoolers. I included no-knead sandwich bread and homemade ricotta in the curriculum. Ricotta is a fun, kid-friendly project that has a great aha moment: pouring the acid in causes the curds to separate from the whey in a matter of minutes. Ladle the curds into a cheesecloth-lined strainer set over a bowl and you’ve got ricotta. (The whey is a great swap for water in the no-knead bread recipe. Save it for up to 1 week.)

One taste of the homemade variety and I was hooked. I slathered it on warm toast, drizzled with a peppery olive oil, and showered it with flaky sea salt and freshly ground black pepper twice daily until the batch was gone.

Even though it’s easy and quick to make, the real reason to DIY ricotta is for the pure milk flavor with a bright, lemony tang. A note on ingredients: it’s worth splurging on high-quality organic milk. If you have a dairy stand at the farmers’ market, now is the time to indulge. This is about highlighting quality, otherwise there’s a yellow tub with your name on it at the store.

Serve this drizzled with oil and crackers, ideally with prosciutto, salad, and your other favorite sides nearby. Oh, and pour some rose, beer, or whatever your favorite drink is, too.

Homemade Ricotta Makes about 1 quart

Ingredients 12 cups whole milk 2 cups heavy cream ½ cup fresh lemon juice (you can also use distilled white vinegar) 2 teaspoons salt

Equipment: Cheesecloth, strainer, large pot, candy thermometer or an instant-read thermometer

Line a strainer with triple-folded cheesecloth. Set over a large bowl. Set aside.

Combine the milk and cream in a large pot over medium heat. Clip a candy thermometer to the side of the pan, if you have one. Warm the milk to 200º F. (This should take about 20 minutes.) Remove from the heat; stir in the lemon juice and salt. When the curds have separated from the whey, about 10 minutes, ladle them into the cheesecloth-lined strainer. Pour the remaining whey into the strainer and save for bread or discard.

Let drain until ricotta reaches the desired consistency, about 45 minutes to 1 hour. Transfer to an airtight container and refrigerate. Ricotta will keep for up to 1 week.

 
Raw Spring Salad with Asparagus and Radishes
 
spring-salad-with-radishes-asparagus-and-scallions.jpg

Perfectionism has been getting in the way of this blog. I have been working on a German Chocolate Cake cookie that has gone through FOUR iterations, and it still has one last test to go. I’ve been missing writing, and I’ve been missing sharing recipes with you. ("You" meaning hopefully someone in addition to my mom.)

I’ve been obsessing about how to get that cookie right, (this seemsto be a habit by now…) and along the way I forgot that sharing a simple salad recipe in the vein of Nigel Slater is sometimes enough. Do you know Nigel Slater’s books yet? They are so beautiful and give a sense of place without the visual clutter of unnecessary props and stylized backgrounds. His easy-going, natural prose draws me in each time I open Ripe or Tender, and Jonathan Lovekin’s photographs offer a sultry complement to Nigel’s (can I call you Nigel, Nigel?) personal recipes.

Other places to find the same lovely qualities are on Molly Wizenberg’s blog, Orangette and in Luisa Weiss’s blog The Wednesday Chef. They are all personal but not self-obsessed; open but not over-sharing. Plus, their photographs are moody and gorgeous. (I’m also a big fan of their memoirs, which you can find here and here, respectively.)

Anyway, have you ever read food writing that describes a food "as begging for" something? Like, the bread was begging to be toasted. The ramps were begging for a slick of olive oil. I have never heard my food beg me to do anything other than scarf it down with haste, but this is as close as it’s ever gotten to human-plant ESP.

Finally, fresh vegetables line the farmers’ market stalls, practically begging to be tossed into a fresh spring salad. Oops — did I say begging? Well like I said, magenta radishes, snappy asparagus stalks and fuchsia scallions got as close to a whisper in my ear that any food as ever gotten.

So yes, this recipe is easy. Slice the radishes, asparagus, and scallion thinly to let them soak in the olive oil and lemon juice. Play with the proportions as you like. More quinoa and add lettuce for a stronger salad vibe. Swap the blue cheese for goat cheese. You get it.

Lastly,a question for you: Do you like casual, easy recipes like this? Or are you looking for more specific directions. Please share your thoughts and comments below!

spring-salad-with-radishes-asparagus-mint-and-quinoa.jpg

Raw Spring Salad with Asparagus and Radishes Serves 1 to 2

4 radishes, thinly sliced 6 stalks asparagus, thinly sliced on the bias 1 small scallion, thinly sliced A few tablespoons extra-virgin olive oil Juice of half a lemon Flaky sea salt and freshly ground black pepper 10 to 15 mint leaves, torn 1 cup cooked quinoa 2 ounces soft blue cheese, crumbled

Toss the radishes, asparagus, and scallion in a bowl. Drizzle with a little olive oil and the lemon juice and toss to coat. Add more olive oil if desired. Season to taste with salt and pepper and fold in the mint leaves. Serve over cooked quinoa and dollop with blue cheese.

 
The Ultimate Cream Cheese Brownie Recipe
 
swirled-batter-closeup-text-2.jpg

Creating a new baking recipe can sometimes feel like Groundhog Day. Not February 2nd, but the Bill Murray movie, which carries lessons for life, love, and apparently recipe developing.

The first time I make a recipe, I happily measure, mix, and stir as my way towards a new creation. The second time, frustrated and fearful of a long process, I rush through, anxious to get to the other side and hopeful that it works out. Here is where it might be easy to call something good enough and move on. But, what is the point of putting another recipe out into the world if it's not just right? I pull the sugar and flour containers back out and get started on batch #3. This one turns out perfect! But wait, the brownie layer is meekly thin and overpowered by the cream cheese top.

Now, I'm making the same recipe for the fourth time, and I'm questioning the entire process of blogging and recipe development as I spoon and level my flour. What is the point of putting another brownie out there? Will anyone appreciate the three pounds of butter, four pounds of chocolate and countless cups of sugar that have gone into perfecting this recipe?

brownie-beauty.jpg

Just as I'm hitting a low, waiting for the last batch to come out of the oven, I remember: The point of blogging or creating a recipe (or doing whatever you feel pulled towards doing) is to put something into the world because something in you needs to. (Check out Elle Luna's great article The Crossroads of Should and Must for more on this.)

I fixated on my ideal cream cheese brownie and I feel like I finally nailed it. Pockets of tangy cream cheese dip through each bite of cake, which is studded with pockets of melted chopped chocolate. The ratio of top to bottom is well-balanced: about 1/3 cream cheese to 2/3 chocolate. Finally, I'm released from the repetitions and ready to share the recipe.

brownie-grid.jpg

I've been working on my brownie recipe for years, and the base of this one has grown out of countless tests, tweaks, and revisions.  The topping is inspired by a Cook's Illustrated recipe and I drew on their method for swirling the chocolate batter in without too much mixing. The secret is pulling out a 1/2 cup of batter before adding the cream cheese layer. After scraping the remaining batter into the pan, you top it with the cream cheese mixture. Smooth this out almost to the edges, then dollop with the remaining 1/2 cup batter. Then, use a chopstick or the tip of a butter knife to swirl the batter into the cream cheese.

finished-swirl-and-final-brownie.jpg

I could look at those swirls all day. They are mesmerizing! There's something so satisfying about creating something that is not only delicious, but beautiful. Now what are you waiting for? Time to get swirling!

grid-of-brownies.jpg
––
Big Update! Hi Mostess readers! If you've been following me on Instagram, then you know that I've been working on a cookbook for a long time. It's called Healthyish and will be out on January 9th, 2018!
I've also launched a new website that showcases my published recipes and will serve as a hub for all work I do going forward (including a new recipe blog.) Check out LindsayMaitlandHunt.com and let me know what you think!
––

The Ultimate Cream Cheese Brownie Recipe Recipe by Lindsay Maitland Hunt

Makes 24 brownies

Ingredients

For the cream cheese topping: 8 ounces cream cheese 1 cup sour cream, at room temperature 2 tablespoons all-purpose flour 2 tablespoons granulated sugar 1 teaspoon pure vanilla extract ¼ teaspoon fine salt

For the brownies: 3 sticks unsalted butter, cut into 1-inch pieces, plus more for the pan 1 cup plus 2 tablespoons all-purpose flour, spooned and leveled ¾ cup natural cocoa powder (not Dutch-processed) 2 ¼ teaspoons fine salt 1 ½ teaspoons baking powder 6 ounces unsweetened chocolate, chopped (1 cup) 1 ½ cup granulated sugar 1 ½ cup packed dark or light brown sugar (dark is recommended) 6 ounces semisweet chocolate, chopped (1 cup) 5 large eggs, at room temperature 2 teaspoons pure vanilla extract

Make the cream cheese topping

Warm the cream cheese in the microwave or in a saucepan over low heat, whisking frequently. The cream cheese should be completely smooth with no lumps remaining.

Transfer to a medium bowl and whisk in the sour cream, flour, sugar, vanilla, and salt. Set aside.

Make the brownies

Preheat the oven to 350º F with a rack set in the center. Butter a metal or glass 9-by-13-inch pan. Line with parchment paper with two flaps overhanging on the sides long, then butter the parchment.

In a medium bowl, whisk the flour, cocoa, salt, and baking powder; set aside.

Combine the unsweetened chocolate and butter in the top of a double boiler set over a pan of simmering water. Cook, stirring frequently, until the chocolate and butter are completely melted, 3 to 5 minutes. (You can also do this in the microwave)

Transfer the chocolate-butter mixture to a large bowl. Whisk in both sugars and scrape down the sides with a rubber spatula. Add the eggs one at a time, whisking until incorporated and scraping down the sides as necessary. Stir in the vanilla.

Sprinkle the flour mixture over the chocolate mixture and whisk until just combined. Fold in the semisweet chocolate. Remove ½ cup of the batter and set aside. Scrape the remaining batter into the prepared pan and smooth with an offset spatula.

Dollop the cream cheese mixture evenly over the brownie batter. Smooth with a clean offset spatula. Dollop the remaining brownie batter on the cream cheese layer. Use a chopstick or the tip of a butter knife to swirl the batter and cream cheese. Do not overmix.

Bake the brownies, rotating once, until a toothpick inserted in the center comes out clean, 50 to 55 minutes. Let cool completely before cutting into 24 squares.

 
Chunky Whole-Grain Miso Cookies with Pistachios, Sesame, and Dried Apricots
 
whole-grain-miso-chunk-cookie1.jpg

If this were another blog, the title of this post would probably be "On overcoming personal struggles and learning to live a new life" or something along those lines. But, since it's a food site, there's a cookie recipe with a side of life lessons.

On a chilly Friday in February one year ago, I was living in Manhattan, working at Real Simple, and making recipes that appealed to the magazine’s broad demographic (aka delicious crowdpleasers). But most importantly, I had the first in a series of year-long, debilitating chronic migraines. Thus began an arduous journey to get to the bottom of the headaches. I tried my traditional method of strong-arming my way towards success, but as anyone who’s had a migraine knows, that just doesn’t work. I waited for the pain to pass, but day in and day out, it kept me company like the worst of frenemies. I couldn’t kick it.

If you had told me then, that twelve months later I would be sitting at home in Brooklyn, working freelance, mostly migraine-free, and baking a celebration miso cookie (read: non crowd-pleaser), I couldn’t have believed it. It’s been a long journey, filled with about 40 different doctors and a lot of biofeedback and acupuncture, but I’m finally here, cookies in hand.

I’m still figuring out how to write about the past year. As I process it, I keep returning to my favorite passage at the end of Wild, Cheryl Strayed’s memoir about hiking the Pacific Crest Trail. (Wild is in theaters, now, and it’s fantastic, but I recommend reading the book first as well as Tiny Beautiful Things, Strayed’s compilation of her incredible Dear Sugar columns.) Skip ahead if you don’t want to read the last few paragraphs of Wild. She writes:

“After he drove away, I leaned my head back and closed my eyes against the sun as the tears I’d expected earlier at the bridge began to seep from my eyes. Thank you, I thought over and over again. Thank you. Not just for the long walk, but for everything I could feel finally gathered up inside of me; for everything the trail had taught me and everything I couldn’t yet know, though I felt it somehow already contained within me. How I’d never see the man in the BMW again, but how in four years I’d cross the Bridge of the Gods with another man and marry him in a spot almost visible from where I now sat. How in nine years that man and I would have a son named Carver, and a year and a half after that, a daughter named Bobbi. How in fifteen years I’d bring my family to this same white bench and the four of us would eat ice-cream cones while I told them the story of the time I’d been here once before, when I’d finished walking a long way on something called the Pacific Crest Trail…“...It was all unknown to me then, as I sat on that white bench on the day I finished my hike. Everything except the fact that I didn’t have to know. That it was enough to trust that what I’d done was true. To understand its meaning without yet being able to say precisely what it was, like all those lines from The Dream of a Common Language that had run through my nights and days. To believe that I didn’t need to reach with my bare hands anymore. To know that seeing the fish beneath the surface of the water was enough. That it was everything. It was my life—like all lives, mysterious and irrevocable and sacred. So very close, so very present, so very belonging to me.“How wild it was, to let it be.”

I went through a lot of ups and downs adjusting to self-employment and trying to get over migraines, days where I hardly left the apartment and worked in complete solitude, or days where I was in too much pain to get up. But, as I struggled to find answers, I found the capacity for a new level of creativity, the ability to jettison fear, a new habit of welcoming the unpredictable (both miso cookies and health setbacks alike) and living with joy.

So, I’m celebrating in my favorite way, by baking. I wanted to make something weird and out of the ordinary, like my past year. These began as a haywire riff on my oatmeal raisin recipe, eventually turning into a kooky distant relative that boasts a hit of umami-rich miso, and a mix of whole grains, nuts, and seeds.

One bite vibrates with rich flavors: dark brown sugar and dried apricots boost the caramel undertones while sesame seeds and roasted pistachios amplify the miso’s nuttiness. This unusual cookie is not going to be everyone’s favorite, but it might knock the socks off a few tasters.

Cheers!

stack-of-whole-grain-miso-cookies-with-pistachios-and-apricots.jpg

Chunky Whole-Grain and Miso Cookies Recipe by Lindsay Hunt

Makes 2 dozen cookies

Ingredients: 1 cup whole wheat bread flour (140g) or: use 1 ¾ cups whole wheat or all-purpose flour in place of the bread and cake flours) ¾ cup cake flour (96g) ¾ cup wheat bran (37g) 1 teaspoon baking soda 1 pinch fine salt 2 teaspoons ground ginger 1 cup toasted chopped pistachios, chopped ½ cup old-fashioned rolled oats (150g) 1 cup dried apricots, chopped (260g) ¼ cup white or black sesame seeds (or a mixture of both), plus additional for sprinkling 2 sticks (1 cup) unsalted butter, at room temperature 1 cup packed dark brown sugar (200g) 3/4 cup granulated sugar (170g) 2 tablespoons white miso paste 2 large eggs plus one egg yolk (for garnish), at room temperature 1 teaspoon pure vanilla extract

Equipment: Two baking sheets, ideally without rims, parchment paper or nonstick cooking mats such as silpat, an airtight container to store the cookie dough in, and a digital scale (if you have one)

Combine the flours, bran, baking soda, salt, and ginger in a medium bowl. Whisk until thoroughly combined. Stir in the oats, pistachios, sesame seeds, and apricots; set aside

Place the butter, sugars, and miso in the bowl of a stand mixer fitted with the paddle attachment (or use a hand mixer). Cream on medium-high speed until light and fluffy, 3 to 4 minutes. Stop the mixer occasionally and scrape down the sides and paddle with a rubber spatula.

Add the two whole eggs and vanilla and mix on medium speed until well combined, about 1 minute. Add the flour mixture and mix on low speed until just combined, about 30 seconds.

Transfer the dough to an airtight container and refrigerate at least 2 hours, but preferably 24 to 72 hours.

30 minutes before baking, preheat the oven to 350º F. Line two baking trays with parchment paper or silicone mats.

Portion the dough into 2-ounce (55 gram/2 heaping tablespoon) scoops. Roll gently with your hands into balls. Space the dough 3 inches apart on each tray, about 8 to a tray. Flatten gently with your hand.

Brush the remaining egg yolk onto the prepared cookies, dividing evenly. Sprinkle with additional sesame seeds.

Bake for 18 to 22 minutes, rotating the trays front to back and top to bottom halfway through. Pull the cookies out when they look just set—they will continue to cook when they come out of the oven. They will not be mostly blonde with small spots of golden brown. They will turn completely golden brown as they cool on the cookie sheets. (**Timing may vary based on the size of your cookies, how cold the dough is, and your oven.)

Cool the cookies on the sheets for 5 minutes, then transfer to a wire rack to cool completely. Cookies will keep in an airtight container for up to 3 days.

Goodbye from the bottom of this seed-studded cookie!

bottom-of-miso-cookie.jpg
 
Winterfresh Salad with Roasted Sunchokes
 
winterfresh-salad-with-roasted-sunchokes.jpg

Circa-midwinter, after all the holiday cheer, I usually want to hunker down with chunk of bread pudding, a steaming bowl of stew, and as many simple cakes as my oven will fit. But, this January, I’ve been doing an elimination diet to diagnose any hidden food allergies, which has stolen my trusty sidekicks away. This means no cheese, no eggs, no sugar, no prosciutto, no lemons.

So what’s a comfort-food-loving girl to do? It turns out that eating healthily in the winter doesn’t just have to be a bowl of quinoa topped with beans and half an avocado (though, that’ll do on most days). Sometimes, it’s nice to forget winter entirely and make something light, crisp, refreshing—and dare I say it?—summery.

Beneath the vibrant hues of carrot, radish, and snap pea in this recipe there is one tuberous winter star: nutty, roasted sunchokes. Alongside the raw vegetables they offer a grounding, earthy balance. The key to great sunchokes is a lot of oil—more than you might be comfortable with at first, but please withhold judgment until you try one—and letting them become so meltingly tender, they flatten with the gentlest squeeze.

I’m not going to pretend this is an “easy, fast meal!” because it will take some time and knife skills or a mandoline. Don’t rush it. Lean into the faux-July vibe with a beachy soundtrack and let the chopping begin. I recommend prepping the sunchokes first and letting them do their thing in the oven while you slice the remaining vegetables.

And, if you’ve never tried a watermelon radish before, it’s time. Aren’t they stunners? (See below.) It’s a sweeter, milder version of the peppery, small variety you normally see in the market. If you can’t find the watermelon kind, any other radish type will do.

Once the salad's ready, heap some into your favorite deep bowl, perch yourself window-adjacent, and peer out at a (hopefully) bluebird sky. For just a second, you might forget it’s actually frigid beyond the pane. I know I did.

watermelon-radishes.jpg

Winterfresh Salad with Roasted Sunchokes By Lindsay Hunt

Serves 4 to 6

1 pound sunchokes (also called Jerusalem artichokes), well scrubbed and mostly peeled, cut into 1-inch pieces ¼ cup olive oil, plus additional to taste Kosher salt and freshly ground black pepper 1 small head napa cabbage, thinly sliced 2 carrots, thinly sliced lengthwise with a vegetable peeler 1 watermelon radish, very thinly sliced 2 cups snap peas, sliced White balsamic or white wine vinegar, to taste

Heat the oven to 400º F. Toss the sunchokes with ¼ of the olive oil, ¾ teaspoon salt, and ½ teaspoon pepper. Roast, tossing occasionally, until very tender, 25 to 30 minutes.

Meanwhile prep the vegetables as listed in the ingredients list. Toss them in a large bowl with olive oil, vinegar, salt, and pepper to taste. Use clean hands to massage the vegetables, particularly the cabbage, so they tenderize.

When the sunchokes are roasted, let cool slightly, then use a slotted spoon to transfer to the salad bowl. Toss together and serve.

 
Spiced Cardamom and Rye Waffles
 
spiced-cardamom-and-rye-waffle-recipe.jpg

There's something magical about having waffles for breakfast. Starting the day with such a luxurious tone can only lead to good things, I think. Typically, I am the happy recipient of whatever waffles my mom whips up when I am visiting -- usually crunchy, Belgian-style grids that are light and airy. This Christmas when I was home, I decided to mix it up.

The result is something a little denser, with a toothsome bite from whole grains and ample spices to toast a gloomy winter day. Cardamom's fragrant notes match up perfectly with earthy rye flour. True, there's only 1/4 teaspoon in the recipe, seemingly not enough to either perfume the batter or give it top billing in the title. I promise that little bit will shine through in just the right way before hitting that metallic too-much-cardamom taste. As for the rye, Bob's Red Mill sells dark rye flour if you don't have some already on hand.

These make for the perfect wintery weekend brunch, preferably with fat snowflakes falling slowly outside, but I'll leave that part up to the weather.

Spiced Cardamom and Rye Waffles Serves 4

6 large eggs, separated 1 ½ cups buttermilk ½ stick (4 tablespoons) unsalted butter, melted and cooled to room temperature 2 teaspoons pure vanilla extract ¾ cup all-purpose flour, spooned and leveled ¾ cup dark rye flour, spooned and leveled ¼ cup granulated sugar 2 teaspoons ground cinnamon 1 teaspoon fine salt 1 teaspoon ground ginger 1 teaspoon baking powder 1 teaspoon baking soda ¼ teaspoon ground cardamom Salted butter, maple syrup, and sliced banana, for serving (optional)

Special Equipment: Waffle maker, egg white beaters (optional)

1. Preheat a waffle maker on highest setting.

2. Beat the egg whites in a small bowl with an egg beater, whisk, or an electric mixer fitted with the whisk attachment until stiff peaks form. You should be able to lift your whisk or beater, turn it upside down, and the egg whites should stand straight up. Set aside.

3. Whisk the egg yolks, buttermilk, melted butter, and vanilla in a medium bowl until well combined. Set aside.

4. Whisk the all-purpose flour, rye flour, sugar, cinnamon, salt, ginger, baking powder, baking soda, and cardamom in a large bowl until well combined. Whisk in the egg yolk mixture until almost incorporated—it’s okay if some lumps remain. Add the egg whites and fold with a spatula until just combined. Do not over mix!

5. Spread about 1 heaping cup on the heated griddle, spreading from the middle outwards. Cook until done according to your waffle maker’s instructions. Repeat with remaining batter and serve immediately with butter and maple syrup, or your favorite accompaniments.

 
How to Decorate Sugar Cookies (Plus Your Essential Toolkit!)
 

Decorating sugar cookies is one of my favorite holiday activities. I love sitting down for an afternoon of icing and sprinkles. Once you have your batch of sugar cookies ready to decorate, it’s time for the fun part. Choose from three icing recipes (based on what you already have in your pantry) and set up your toolkit for cookie success. Let’s get started!

If you’re home with family for the holidays, I recommend getting everyone involved. For the past three years, my mom, sister, and I have decorated 200 cookies for our holiday party. Sitting together and chatting while we’re icing is fun catch-up time, and it’s inspiring to see the different designs we each come up with.

If you’re alone, I highly recommend queuing up a few podcasts to keep you company. I got through about ten episodes of Serial and Inquiring Minds during my recipe development for this post.

If you read my sugar cookie recipe post, you know I have a lot to say about best practices. This is another long post. I wanted to share everything I’ve learned over the past three years so you can have great success! With that in mind, I’m going to jump past storytelling and science to get right to the how-to.

About my icing recipes:

When it comes to something like the icing on a sugar cookie, taste isn’t a paramount concern. The icing is usually covered by sprinkles and/or spiked with food coloring. It’s all about ease for me. I want it to come together quickly with things I have in my pantry and I want it to be easy to pipe on the cookies.

Regarding food coloring: I like to decorate with white icing and use various sprinkles as my color. If you do want to use food coloring, choose your recipe below, then divide the final batch into separate bowls and color as desired.

Make measuring easy! A standard 1 pound box of confectioners sugar equals 3 ¾ cups. All recipes assume you are using one box. If you have a large bin in your pantry, weigh 1 pound or measure 3 ¾ packed cups.

Okay, commence the icing choose-your-own-adventure!

Here's what the consistency of your icing should look like when you lift the whisk out of the bowl. Slightly runny but not watery:

royal-icing-consistency2.jpg

Royal Icing with Egg Whites This produces an icing with the trademark glossy sheen of a good royal icing. It’s easy to make, since you likely have 3 eggs sitting in your fridge. The concern here is using raw egg whites, which can be a health concern for some. You can solve this by buying pasteurized eggs (they exist!) or using meringue powder.

Make the icing: Combine 1 lb. (3 ¾ cups) confectioner'ssugar with 3 large eggwhites in the bowl of an electric mixer fitted with the whisk attachment (or use a handheld mixer). Whisk on medium-high until peaks form. Thin as needed with 1 teaspoons of water at a time until the icing looks glossy and bright white.

Royal Icing with Meringue Powder Meringue powder is made from powdered egg whites and is my favorite pick to make royal icing. You’ll still get the volume and body of an egg white-based royal icing, but without health concerns of raw eggs. Plus, meringue powder is inexpensive and can keep in your pantry for years. This is a great option for health safety and that classic look, but requires getting an extra ingredient from the store.

Make the icing: Combine ½ cup meringuepowder with ½ cup water in the bowl of an electric mixer fitted with the whisk attachment (or use a handheld mixer). Whisk on medium-high until peaks form. Add 1 lb. (3 ¾ cups) confectioner'ssugar and beat until well combined. The mixture should look glossy and bright white. Thin as needed with 1 teaspoon of water at a time.

Milk-based Icing (Egg-Free) Technically, a royal icing has to contain eggs, so this super simple version is just an icing. It doesn’t have the brilliant white shine of the egg-based royal  but it is so easy. I recommend this version if decorating with kids or if you want to quickly decorate a batch. This recipe is good for anyone with egg-allergies or who doesn’t want to buy a special ingredient or use raw eggs.

Make the icing: Combine 1 lb. (3 ¾ cups) confectioner's sugar and ¼ cup milk in the bowl of an electric mixer fitted with the whisk attachment (or use a handheld mixer). Whisk on medium-high until the mixture is completely smooth with no lumps remaining. Add 1-2 tablespoons milk, until the mixture is easily pourable but not too runny.

When you lift whisk out of the mixture, the icing should slowly run off the end, not pour too quickly. If you have added too much milk, just add some more confectioners sugar.

cookie-decorating-tool-kit.jpg

Your Decorating Tool Kit

Once you have the cookies and the icing ready, a few tools make decorating easy and efficient. I have SweetDaniB, a cookie-decorating guru, to thank for teaching me about how to decorate a cookie well, and what is helpful to keep on hand (more about her in my sugar cookie post). Check her site and instagram out for inspiration.

Squeeze bottles vs. Pastry bags I use small squeeze bottles to decorate my cookies. They are reusable, easy to refill, and easy to handle. Pastry bags, particularly plastic ones, are fine to use, but I find they create extra mess. I particularly like accordion-style squeeze bottles like these from Kuhn Rikon. If you do use a squeeze bottle, I recommend keeping it inverted it in a sturdy glass or mug between piping, so the frosting is easy to squeeze out.

Surgical Tweezers For intricate designs and accurate placement, an inexpensive pair of surgical tweezers are indispensable. Amazon stocks inexpensive ones.

Offset Spatula After piping icing into your desired shape, an offset spatula allows you to smooth the icing to evenly fill the shape. I also use a clean offset spatula to gently press  and jimmies into the icing to firm up an edge.

Toothpicks What can’t this kitchen workhorse do? A box of toothpicks is inexpensive and will see you through testing cakes, hors d’oeuvres, and now, cookie decorating. Use to smooth icing, as with the offset, above, to fill up a design or smooth an edge.

Paper plates Decorating on top of a paper plate allows you to save the sprinkles that don’t attach to the icing. After the sprinkles have covered the icing, move the cookie aside, fold the plate into a funnel-like shape and pour the remaining sprinkles back into the original jar. Repeat with fresh icing and sprinkles.

Rimmed baking sheets It’s a constant battle between my creative artist side and my inner neat freak when it comes to decorating cookies. I love the explosion of colors and shapes and it can be fun to let loose and see what fun designs you can create. However, nonpareils have a sneaky way of rolling amok. Decorating with all your tools inside a rimmed baking sheet keeps the mess at bay.

sugar-cookie-inspiration.jpg

How to ice the cookies:

Now that you’ve read through all of the above, I hope it doesn’t seem too daunting. To ice is actually quite simple.

For a lined design: Squeeze or pipe the frosting into your desired design, pour the sprinkles on top, remove the cookie, fold the paper plate and pour the sprinkles back into the bottle, and repeat.

For a filled design: Pipe the outline of the shape. Then, pipe even zigzags of icing inside the shape to fill. Smooth with an offset spatula or toothpick, then pour sprinkles over the icing. Remove the cookie, fold the paper plate and pour the sprinkles back into the bottle, and repeat.

To create different areas of color, sprinkles, etc: Pipe the first area, decorate with sprinkles, then let dry for at least 20 minutes. If the icing is still wet at all, the other color of nonpareils will find a home in the already iced portion.

A big note for ultimate success!: Do not pipe your icing too close to the edge of the cookie. Start with a ¼-inch border until you feel more confident with your technique. Sprinkles will weigh the frosting down and push it towards the sides. If you do have frosting that runs down the sides, don’t panic. Use a toothpick or an offset spatula to scrape along the cookie, perpendicular to the edge. (I actually love this look and use it often now.)

Good luck and have fun!

 
Easy Holiday Sugar Cookie Recipe and Tips
 
lemon-and-vanilla-sugar-cookies-mostess.jpg

Happy holidays, Mostess readers! I'm excited to share the results of my three-year obsession with perfecting the sugar cookie. It's a long post, because I wanted to share all my tips and techniques for success. If you are well-versed in Sugarcookiedom and "just want the recipe already!" then skip on down to the bottom of the post. For novices and baking nerds alike, read on.

How I became obsessed

Until three years ago, I had never decorated a sugar cookie. Maybe I'd adorned a gingersnap with a casual sprinkle somewhere along the line, but never with any purpose or focus. Then, at Real Simple, I was in charge of an enormous roundup of all the best sugar cookie decorating products. Everything from cutters to sprinkles to the best store-bought icing. As part of this project, which took five months and some 1,000 different bottles of sprinkles, I was lucky enough to hire Sweet Dani B, a master of cookie decorating, to decorate the trial cookies and our final shoot cookies. I spent two full days sitting by her side, learning the tricks of icing and applying sprinkles. (For more on decorating, check out my guide to cookie icing and your essential toolkit.)

After learning how fun and easy it was to transform this blank canvas, I was hooked. I made 150 cookies the first year to test out my skills, 300 last year, and this year, I don't even want to know how many I've gone through. All to get to the perfect cookie that's not too buttery (which causes the dough to spread and lose its shape,) easy to work with, but not too tough.

You may have noticed that I titled this post "easy" cookies. None of the steps are difficult, but they take some focus and planning. I promise the results are well worth it. Between cookie #1 and cookie #500 I learned a lot of lessons the hard way so you won't have to. Here are my tips for maximum cookie success!

The 5 Mostess Sugar Cookie Tips for Success

1. Chill out! 

The techniques for making sugar cookies are simple, but I’m not going to lie to you and tell you that these aren’t time intensive. Success—meaning straight, clear edges and cookies that don’t morph from snowflake into flower-shaped blob in the oven—requires setting aside time to let the dough chill properly.

Chilling the dough does two things: it relaxes the gluten in the cookies, (more on this in my oatmeal-raisin cookie post,) but what is more important here is that it keeps the butter chilled. Warm butter will spread in the oven, making the cookies lose their shape, and they will be hard and not crispy, crunchy perfect.

2. Think ahead.

It may seem like common sense, but prepping your workspace and double checking that you have everything you need are two essential keys to successful cooking and baking, no matter the recipe.

When you are ready to roll out the dough and cut it into shapes, clear out enough space in your refrigerator to store the cookie sheets. I tend to leave this until the last moment and it causes a few knocked-over bottles, etc. Just before rolling, set aside a small bowl with all-purpose flour for dusting. Before cutting the dough out, make sure your cutters are nearby.

3. Be a clean freak.

Rolling dough on a dirty counter means your cookies might pick up specks of food, dust, or eau-de-garlic. Make sure your work surface is extra clean before rolling. I use a vinegar-water mixture to wipe it down just before I start.

4. Give cookies space.

Do not crowd the cookies on the sheet. Despite all the great work you've done to chill the dough adequately, each shape will expand. And, as the cookies bake, the butter releases steam. Too many cookies in the oven leads to a lot of steam, which you don't want. They will take longer to bake, and could end up too hard.

So, give the cookies space on the sheet, and if you can, bake only one sheet at a time, in the center of the oven. (Baking nerds: Check out this fun animation from TEDed about how cookie chemistry works.)

5. Keep an eye on it.

As my good friend Dawn always told me, "America underbakes it's pastry." For some reason this always made me laugh, thinking of the USA as a baker, but it is a truth worth remembering. Underbaked cookies won't be crispy and flaky, which is what you are going for here. Start checking your cookies at 14 minutes and remove them from the oven when just a bit of golden brown rings the edges of the shapes.

All right, enough already! Time to get baking. For icing recipes, tips, and some visual inspiration check out this other post.

classic-sugar-cookie.jpg

Lemon and Vanilla Sugar Cookies by Lindsay Hunt

Makes about 36 cookies

Ingredients: 3 ¼ cups all-purpose flour, spooned and leveled (400g), plus additional for rolling 1 teaspoon kosher salt 1 teaspoon baking powder 2 ½ sticks (10 ounces) unsalted butter, at room temperature 1 ¼ cups granulated sugar 2 large eggs, plus one egg yolk, at room temperature 1 tablespoon pure vanilla extract 2 teaspoons finely grated lemon zest

Equipment: Two baking sheets (ideally without rims), parchment paper or nonstick cooking mats such as Silpat, a digital scale (if you have one), rolling pin, cookie cutters, and a stand mixer or another electric mixer

Make the dough: Whisk the flour, salt, and baking powder together in a medium bowl. Set aside.

Place the butter and sugars in the bowl of a stand mixer fitted with the paddle attachment (or use a hand mixer). Cream the butter and sugar on medium-high speed until light and fluffy, 3 to 4 minutes. Stop the mixer occasionally and scrape down the sides and paddle with a rubber spatula.

Add the eggs, vanilla, and lemon zest and mix on medium speed until well combined, about 1 minute. Add the flour mixture and mix on low speed until just combined, about 30 seconds.

Divide the dough in half and pat into two balls. (You may need to mush them together so they are even and there are no cracks.) Flatten and shape into two 1-inch thick discs and wrap tightly in plastic wrap.

Refrigerate the dough until firm, at least 2 hours and up to 3 days. At this point you can also freeze the dough for up to 1 month.

Roll and cut the dough:

About 45 minutes before you are ready to roll the dough out, remove the dough from the fridge. It has to soften enough to be easy to roll but not so much that it gets too soft and starts to stick to the countertop. Check the dough every 10 minutes or so, when it feels just pliable, it’s ready to roll. This can take anywhere from 20 to 45 minutes depending on the temperature of your kitchen and how long the dough was chilled.

Meanwhile, prepare the cookie sheets and set them next to your work space so they are ready. Working with one disc at a time, roll the dough out on a lightly floured surface until ¼-inch thick. Refrigerate the dough until firm, 20 to 30 minutes. (This is the step you can skip if you are pressed for time).

Return the chilled, rolled dough to the work surface and cut out shapes, placing the cutters as close together as possible. Use a flat spatula, not your fingers, to transfer the cut dough to the cookie sheet, leaving 2-inches between each shape.

Chill the cut dough for at least 20 to 30 minutes and up to 1 hour until very firm. You should be able to pick up a shape with your fingers without it bending at all.

30 minutes before baking, preheat the oven to 350º F with a rack in the middle of the oven. Bake one sheet at a time for 14 to 18 minutes, rotating the tray front to back halfway through. Pull the cookies out when they are golden throughout with golden brown edges.

Let the cookies cool on the sheet for 5 minutes, then transfer to a wire cooling rack to cool completely. If you let the cookies cool completely on the warm baking tray, they will steam and become slightly soggy.

Cookies will keep for up to 1 week in an airtight container.

 
Spiced Carrot Coconut Soup
 
spiced-coconut-carrot-soup.jpg

In December, when I am loading up on cookies and single-handedly demolishing the cheese plate at holiday parties, I find my usual balance of healthy meals and sweets tipping towards sugar overload.

Not to mention, the extra sugar makes me susceptible to the first virus that sweeps through the city. So, why wait for January's resolutions? You can cook a healthy and delicious recipe with immunity-boosting qualities tonight. 

By the way, there's a reason eating a healthy dinner can be a challenge, particularly at this busy time of year. I learned recently that making decisions actually takes more effort as the day progresses, because your brain has used most of its store of glucose. Turns out it's actually harder to choose to make salad instead of ordering in pizza. Keeping a batch of healthy soup on standby takes some work out of the equation.

But what does "healthy" mean? Here, it includes a hearty dose of anti-inflammatory turmeric, stomach-soothing fresh ginger, and calcium-packed carrots. (Turmeric is actually my go-to healing spice now, after a 101 Cookbooks post got me hooked on it.)

While this soup can definitely be vegetarian (just swap the chicken stock for veggie or water), homemade chicken broth has minerals like calcium and magnesium, among other great benefits, so I use it in my version.

Two tips for success: if you have a food processor and like the slicing blade, now is a good time to use it for quick prep. And, don't do like I did and use the coconut milk before mixing. Get a little workout by shaking the can well before opening.

As for the first cold of the season? It's banished. I'm thanking this soup.

Spiced Coconut Carrot Soup by Lindsay Hunt

Ingredients: ¼ cup canola oil 1 bunch scallions, green and white parts only, sliced ¼ to ⅓ cup chopped fresh ginger (use less if you don’t like a lot of heat) 1 teaspoon ground turmeric 1 teaspoon ground coriander 1 teaspoon ground cumin Kosher salt Freshly ground black pepper 1 ½ pounds carrots (about 8 large), peeled and thinly sliced 4 cups chicken stock, preferably homemade, or vegetable stock ½ cup coconut milk Lemon wedges, for serving Toasted pumpkin seeds, for serving Good olive oil, for serving

Equipment: A blender

1. Heat the oil in a large pot over medium-high heat. Add the scallions, ginger, turmeric, coriander, cumin, 2 teaspoons salt, and 1 teaspoon pepper. Cook, stirring often, until the scallions are very soft, about 10 minutes.

2. Add the carrots and stir to combine. Cook, stirring occasionally, until barely tender, about 10 minutes.

3. Add the stock and coconut milk and bring to a boil. Cook until the carrots are very tender, about 10 minutes.

4. Puree in batches in a blender until very smooth. Serve garnished with a squeeze of fresh lemon juice, pumpkin seeds, a drizzle of your favorite olive oil, and extra salt and pepper.

Soup will keep for up to 3 days in an airtight container in the refrigerator.

 
How to Make Perfect 6-Minute Soft-Boiled Eggs
 
img_9616.jpg

I come from a family that loves citing new studies to rationalize behaviors. Red wines are high in antioxidants so go for that refill! Blueberries are a superfood so load up on the muffins! Any new report can be twisted to support what we want.

So, when my dad alerted me to a recent study reporting that eating a high-protein breakfast will "reduce food cravings throughout the day and boost dopamine," I was more than ready to justify my morning egg habit. But, it turns out the reasons for eating a protein-packed breakfast (read: high in fat) are actually legit.

Dopamine is a neurotransmitter that not only helps control impulses, it acts like an all-purpose brain booster affecting general well-being, alertness, and creativity. The bottom line is, protein is essential to good brain function. (For more dietary sources of tyrosine, the amino acid in foods that create dopamine in your brain, check out the links above.)

Back to why you should be eating eggs in the a.m.: The research also suggests that skipping breakfast correlates with an increase in body weight! All the more reason to set fifteen minutes aside for an easy, protein-packed meal.

I'll be sharing more ideas soon for sneaking protein into traditionally sugary morning meals, like smoothies and even granola. For now, I suggest starting with a slice of your favorite toast, two perfect soft-boiled eggs, and ample amounts of butter. And, more good news on the fat front: butter isn't bad for you!

(Please note that if you have special dietary needs that preclude you from eating this type of breakfast, I am in no way suggesting you ditch the doctor's orders.)

Perfect 6-Minute Soft-Boiled Eggs on Toast

Ingredients: 2 large eggs 1 slice bread (New Yorkers, my favorite is from She Wolf Bakery) 2 tablespoons salted butter Flaky sea salt, such as Maldon Freshly ground black pepper

Bring a small pot of water to boil over high heat. Gently lower the eggs into the water. Lower the heat so it is at a simmer and cook for exactly 6 minutes.

Remove the eggs from the heat and run under cold water until they are comfortable to handle. (Now is the time to start toasting your bread.) Tap each shell on a hard surface, then roll to crack the shell all over. Don't roll too hard, just enough to create a web of cracks, this will make it easier to peel. Peel the eggs and discard the shells.

Slather the toasted bread with the butter and top with the eggs. Slice open with a knife, season with flaky salt and freshly ground pepper. Enjoy!

 
Orange-Ginger Cranberry Sauce
 
img_9351.jpg

Hear me out on cranberry sauce. This oft-maligned condiment is actually the stealth star of Thanksgiving.

You may casually spoon a jewel-toned dollop between sweet potatoes and stuffing just for color, but, sure enough, it sneaks onto every forkful, where it can make or break each bite. It's not worth messing with a meal you wait all year for, so this time, why not give it a little extra love?

As for the recipe. You may be thinking: two posts in a row with fresh ginger? She is crazy! Well, that may be true, but I love the spicy undertones ginger adds to sweet recipes. It anchors the sugar and offsets the tart cranberries, directing this under-appreciated dish away from cloying sweetness.

Plus, if you bought ginger to make spiced apple cider, then you probably have extra to use in this recipe.

Sure, you can dress up cranberry sauce with fresh lemon juice or just cook the berries with some sugar, but this slightly spicy rendition is sure to perk up the entire sideboard at your Thanksgiving meal.

Special thanks to Charlyne Mattox for introducing me to ginger-spiked relish. I don't think I'll ever turn back.

img_9354.jpg

Ginger-Orange Cranberry Sauce Recipe by Lindsay Hunt

Ingredients: 3 ½ cups (12 ounces) fresh or frozen cranberries ¾ cup sugar ½ cup freshly squeezed orange juice, plus two 2-inch strips of zest 1 tablespoon finely grated fresh ginger ¼ teaspoon kosher salt

Equipment: A fine grater, such as a Microplane

Directions: 1. Combine the cranberries, sugar, orange juice, ginger, and salt in a medium pot. Bring to a boil over medium-high heat, stirring occasionally. Reduce heat and simmer, stirring often, until about half of the cranberries have popped, 2 to 3 minutes.

2. Cool the sauce and transfer to a serving dish. Cranberry sauce can be made up to 3 days ahead. Let come to room temperature before serving.

 
Gingery Spiced Apple Cider
 
bottle-of-spiced-cider.jpg

This is not news: It's freezing outside. You need something warm to wrap your hands around and maybe to sneak a shot of Bourbon into. I get it. This easy spiced cider recipe takes only five minutes of prep but will perfume your kitchen for a glorious half hour of simmering. Don't blame me if you feel the need to bust out in carols or spontaneously hug your roommate.

Bottle up extras to bring to a Friendsgiving potluck (it's great served cold over ice with a dash of spiced rum) or set a pot on as you watch the Thanksgiving Day parade.

img_9249.jpg

Gingery Spiced Cider Recipe Recipe by Lindsay Hunt

Makes about 10 cups

Ingredients: 1 vanilla bean 1 gallon fresh apple cider, preferably unpasteurized ½ cup (60g) roughly chopped fresh ginger 2 cinnamon sticks 10 whole cloves ½ teaspoon whole allspice ½ teaspoon freshly grated nutmeg (or ground nutmeg) Whiskey or rum, for serving (optional)

Equipment: large pot, fine mesh strainer

Use a paring knife to cut along one vertical side of the vanilla bean open. Using the dull edge of the knife, gently scrape the seeds from top to bottom. Add the seeds and bean to a large pot with the remaining ingredients and stir to combine.

Cover the pot and set over high heat. Bring to a boil, then reduce to a low simmer. Cook, stirring once or twice, until the mixture has reduced by about one third, 30 to 40 minutes.

If serving immediately, strain into a clean pot and set over very low heat. Serve with whiskey or rum, if desired. Or, let cool, stirring occasionally, then strain. Reserve the vanilla bean.

Bottle with the vanilla bean in the original apple cider container or another vessel.

Bottled cider will keep for up to 2 weeks in the refrigerator.

 
72-Hour Oatmeal Raisin Cookie Recipe
 
best-oatmeal-raisin-cookie-recipe.jpg

Please don't be daunted by the title. It's not 72 hours of straight labor to get these perfectly plump oatmeal raisin cookies out of the oven. Those 72 hours are actually optional, but let me tell you why you should take the time to make this recipe.

As David Leite discussed in his article about Jacques Torres's chocolate chip cookies, resting cookie dough allows the eggs to hydrate the flour. This makes the dough bake more evenly, but more importantly, allows the flavors to meld and deepen, resulting in an intense toffee flavor. Another secret to Torres' recipe is the combination of bread and cake flour. Bread flour is high gluten, which results in a chewy texture, and cake flour is low gluten, which gives fancy cakes their trademark light and airy crumb. In cookies, this translates as deliciously crunchy edges.

I wanted to try this two-flour combination in oatmeal raisin cookies, since the best of their kind are praised for both a chewy center and crisp edges. I also thought that letting the dough rest would not only hydrate the flour, it might soften the oats and plump the dried raisins, making for juicier bites. (Spoiler: it did!)

For extra oaty flavor that isn't overly fibrous, I use a blend of old-fashioned rolled oats and instant oats. If you don't want to buy both varieties, blitz some of the old-fashioned kind in a food processor until more finely ground.

Torres' recipe calls for 36 hours and up to 72. Those extra 36 are definitely worth it. However, you can bake the dough the day of, but try for 4 hours of chilling. If you bake the dough without chilling for at least 4 hours, the cookies will spread and crisp around the edges, leaving a wan, light-colored center. That’s not to say they won’t be delicious, they just won’t be evenly baked.

I am indebted to two oatmeal raisin cookie recipes that helped me get to this end point: Joanne Chang's recipe in her cookbook, Flour, which is my favorite baking book, and the Silver Palate Cookbook.

I have included weights in grams for bakers who like to use a digital scale. I am a huge fan since I don't have to dirty measuring cups.

72-hour-oatmeal-raisin-cookie.jpg

72-Hour Oatmeal Raisin Cookies Recipe by Lindsay Hunt

Makes 2 dozen cookies

Ingredients: 1 cup bread flour (140g) 1 cup cake flour (100g) 1 teaspoon baking soda 1 teaspoon fine salt ½ teaspoon freshly grated nutmeg ½ teaspoon ground cinnamon 1 1/2 cups old-fashioned rolled oats (150g) 3/4 cup quick-cooking oats (75g) 1 ½ cups raisins (260g) 2 sticks (1 cup) unsalted butter, at room temperature 1 cup packed light brown sugar (200g) 3/4 cup granulated sugar (170g) 2 eggs 1 teaspoon pure vanilla extract

Equipment: Two baking sheets, ideally without rims, parchment paper or nonstick cooking mats such as Silpat, an airtight container to store the cookie dough in, and a digital scale (if you have one)

Directions: Combine the flours, baking soda, salt, nutmeg, and cinnamon in a medium bowl. Whisk until thoroughly combined. Stir in the oats and raisins; set aside

Place the butter and sugars in the bowl of a stand mixer fitted with the paddle attachment (or use a hand mixer). Cream the butter and sugar on medium-high speed until light and fluffy, 3 to 4 minutes. Stop the mixer occasionally and scrape down the sides and paddle with a rubber spatula.

Add the eggs and vanilla and mix on medium speed until well combined, about 1 minute. Add the flour mixture and mix on low speed until just combined, about 30 seconds.

Transfer the dough to an container and refrigerate at least 2 hours, but preferably 72 hours.

30 minutes before baking, preheat the oven to 350º F. Line two baking trays with parchment paper or silicone mats.

Portion the dough into 2-ounce (55 gram/2 heaping tablespoon) scoops. Roll gently with your hands into balls. Space the dough 3 inches apart on each tray, about 12 to a tray. Flatten gently with your hand.

Bake for 16 to 18 minutes, rotating the trays front to back and top to bottom halfway through. Pull the cookies out when they look just set—they will continue to cook when they come out of the oven. They will not be mostly blonde with small spots of golden brown. They will turn completely golden brown as they cool on the cookie sheets.

Cool the cookies on the sheets for 5 minutes, then transfer to a wire rack to cool completely. Cookies will keep in an airtight container for up to 3 days.

Special thanks to Cat Emil for testing this recipe.